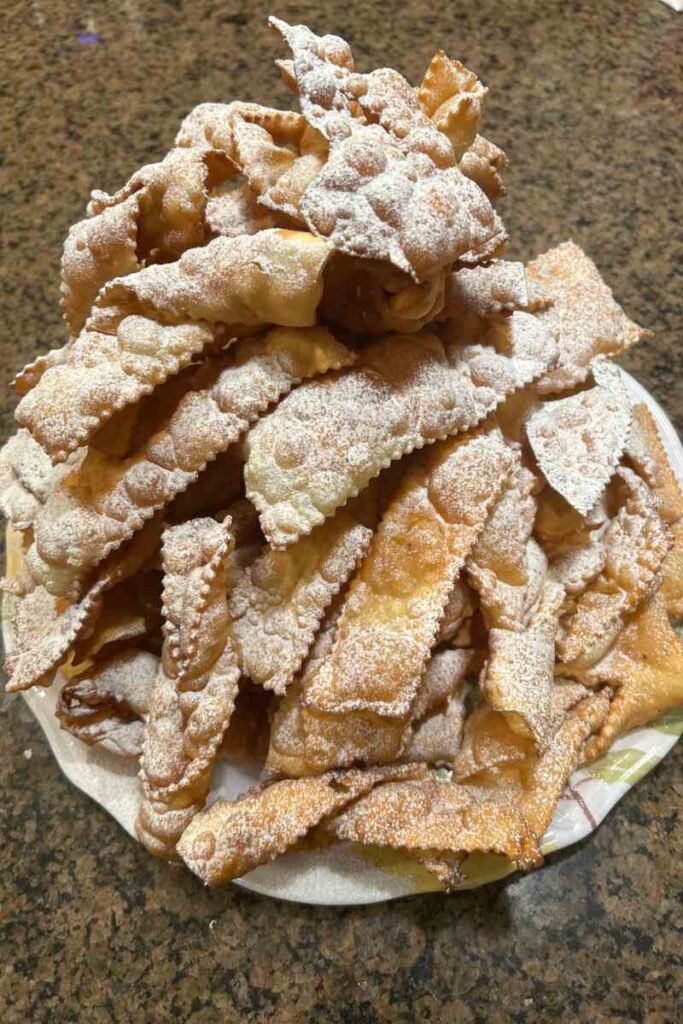
These delicate Italian Crostoli, known as fried pastries in northeastern Italy (or chiacchiere, frappe, bugie, or cenci in other regions), represent Carnival season’s quintessential sweet. The dough, enriched with eggs, Marsala wine, and lemon-infused sugar, is rolled paper-thin, cut into ribbons or diamonds, then fried until golden and crispy.
The result is a light, shattering pastry that dissolves on the tongue, traditionally dusted with powdered sugar and served in towering piles at Carnevale celebrations. Despite their impressive appearance, crostoli require only basic ingredients and straightforward technique, making them accessible to home cooks willing to invest time in proper rolling and frying 😊.
Understanding Crostoli in Italian Culinary Tradition
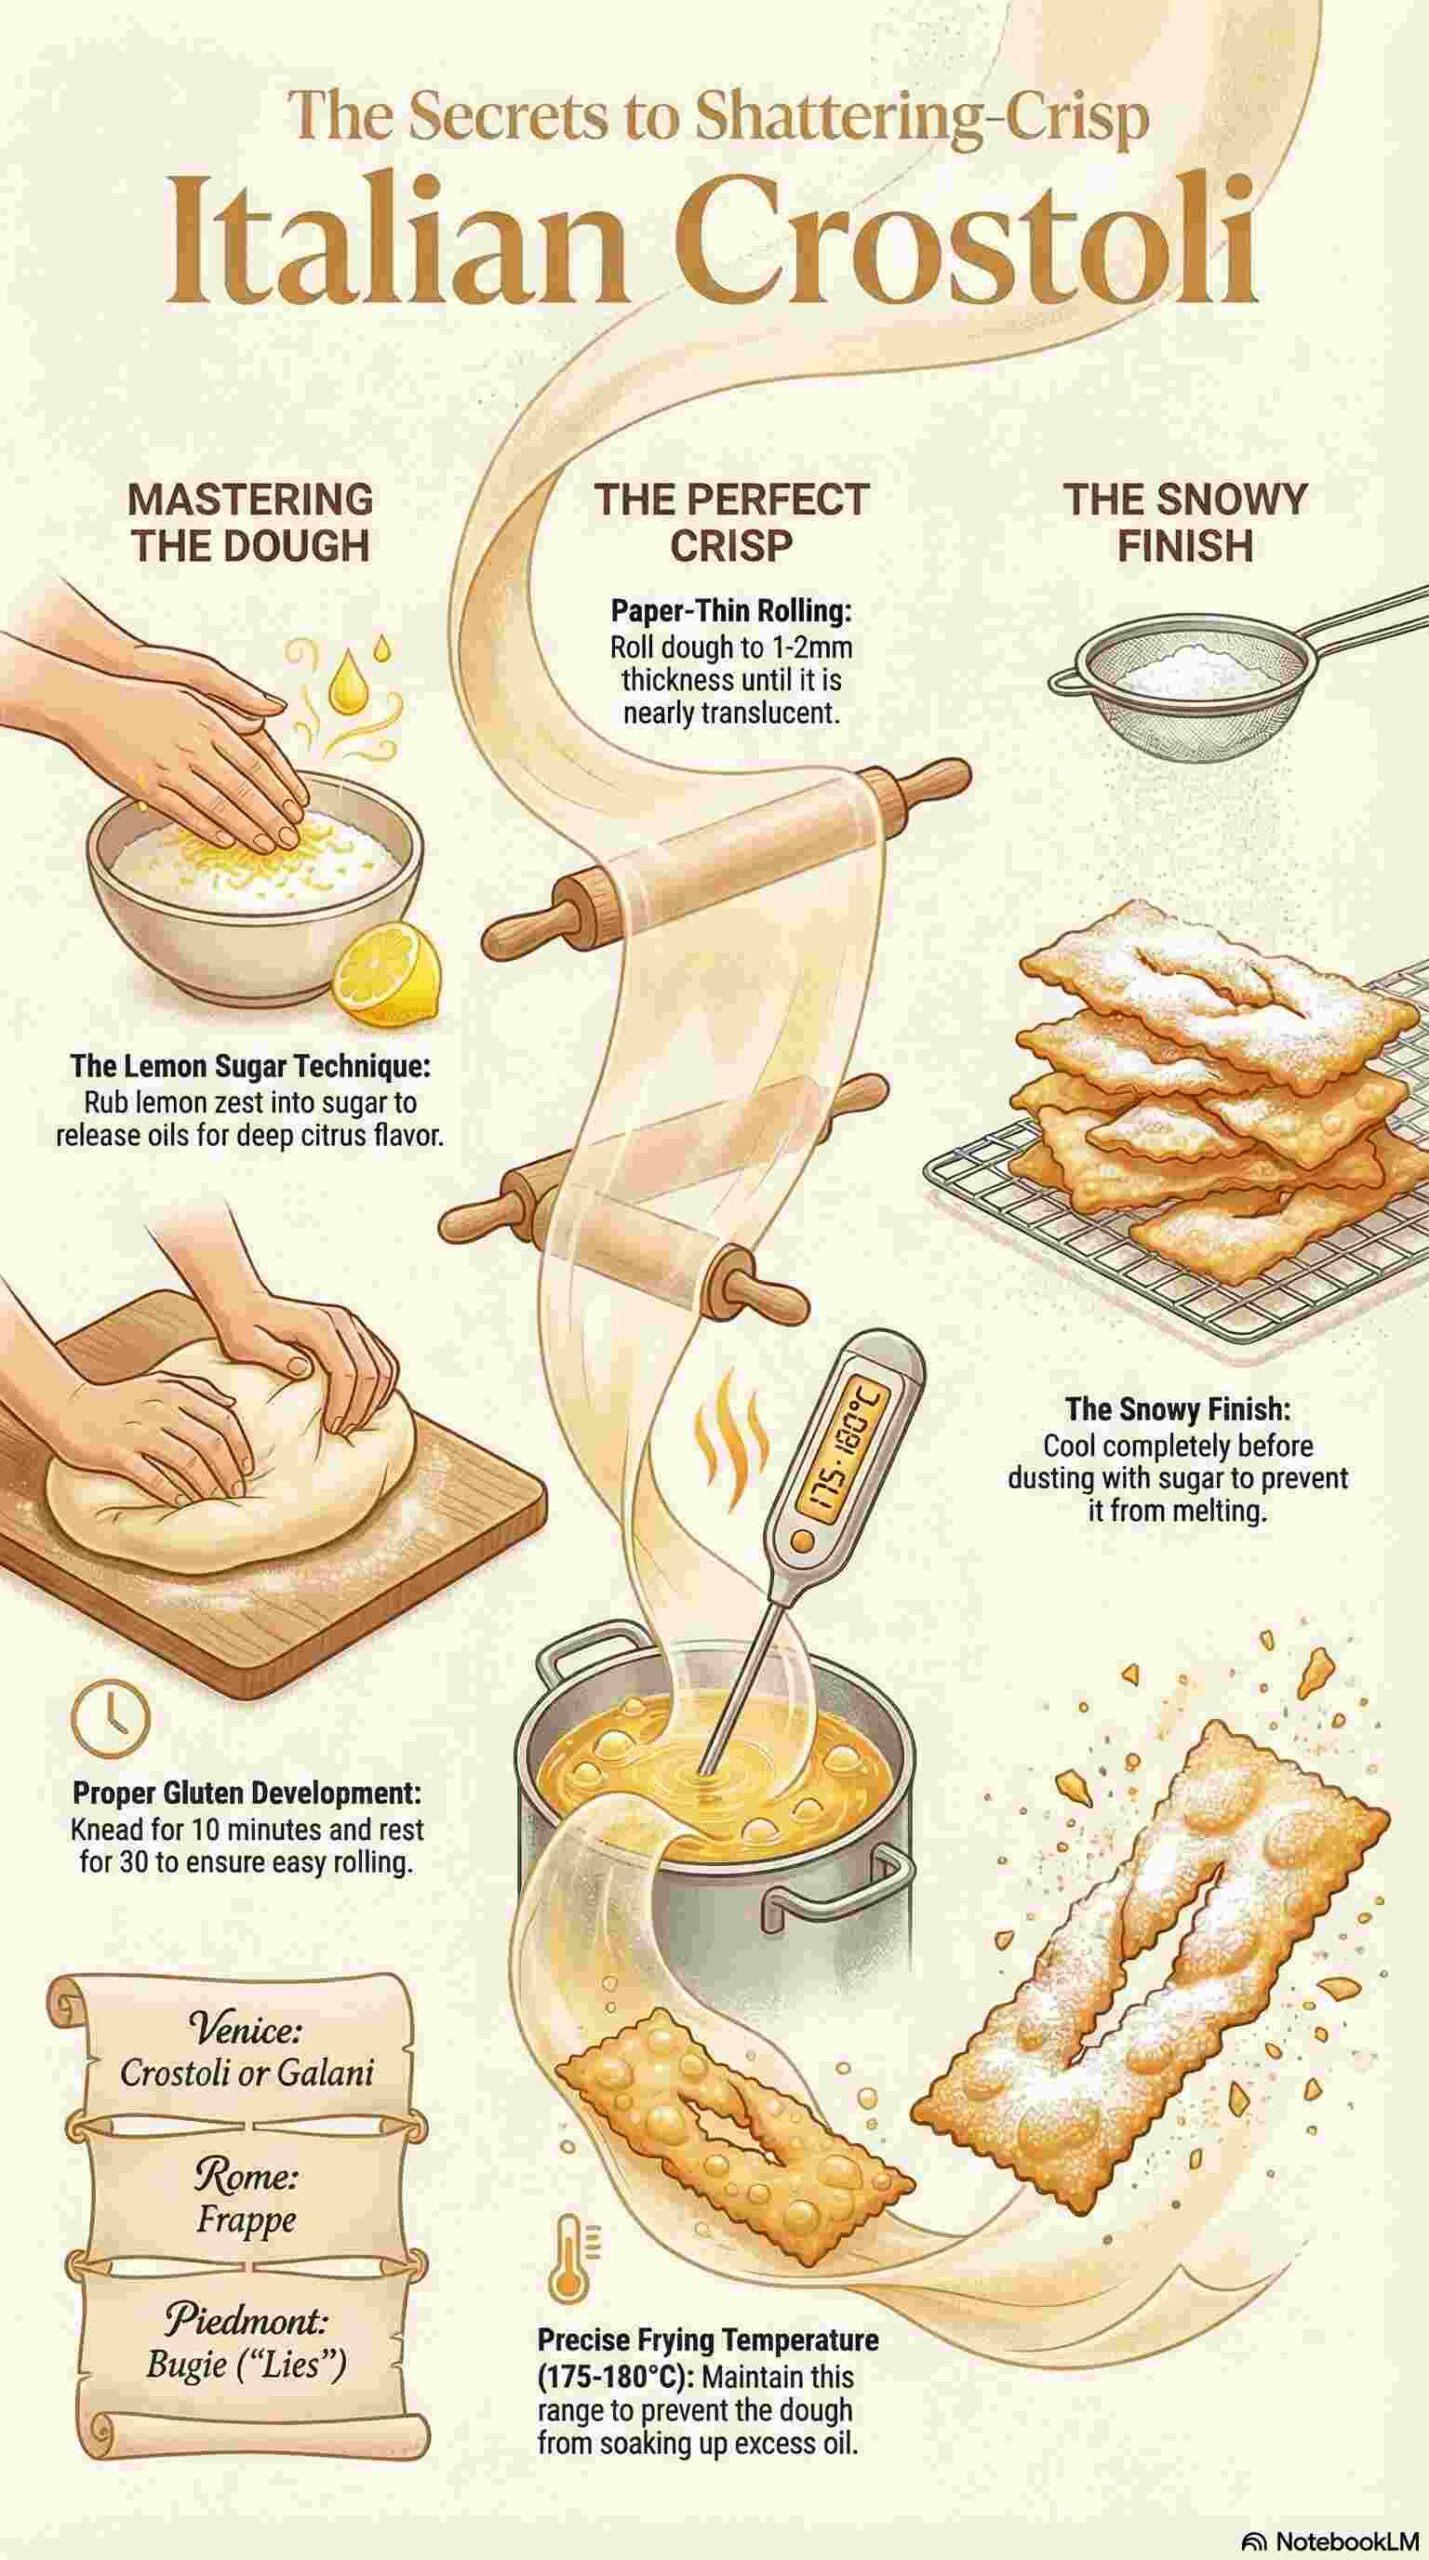
Crostoli belong to Italy’s rich tradition of fried Carnival sweets, created to use up rich ingredients like eggs and sugar before the Lenten fasting period. Different Italian regions claim ownership and use distinct names: Venetians call them crostoli or galani, Romans know them as frappe, Piedmontese say bugie (lies), while Tuscans call them cenci (rags). Despite naming variations, the concept remains consistent: thin, crispy fried dough flavored with citrus and spirits, served during the weeks leading to Ash Wednesday.
The name “crostoli” derives from “crosta,” meaning crust, referring to the pastries’ characteristic crispy, crunchy texture. Traditional recipes vary slightly by region and family, with some using grappa instead of Marsala, others adding vanilla or different citrus, and many incorporating butter or lard for richer flavor. What distinguishes this version is the lemon sugar technique, rubbing zest directly into sugar before building the dough, a small step that dramatically amplifies citrus flavor throughout the finished pastry.
Ingredients
Traditional Italian Crostoli
- Prep Time: 45 minutes
- Cook Time: 20 minutes
- Total Time: 1 hour 35 minutes (includes dough resting)
- Servings: 8–10 people
Ingredients
For the Dough- 500g Italian 00 flour (or all-purpose flour)
- 4 large eggs, at room temperature
- 4 tablespoons granulated sugar (approximately 50g)
- 4 tablespoons sunflower oil (approximately 60ml)
- 4 tablespoons Marsala wine (approximately 60ml)
- Zest of 2 lemons (approximately 2 tablespoons)
- Pinch of salt (approximately ¼ teaspoon)
- Vegetable, sunflower, or peanut oil for deep frying (about 1.5–2 liters)
- Icing sugar (powdered/confectioners’ sugar), for generous dusting
Ingredient Selection and Quality
Flour Selection and Properties
Italian 00 flour produces the most authentic texture: fine, silky, and exceptionally thin when rolled. The “00” designation refers to the flour’s grind fineness, and its ultra-fine texture creates more delicate pastries than coarser flours. If 00 flour is unavailable, all-purpose flour works perfectly well, though the dough may be slightly less silky. Bread flour is too high in protein for crostoli, creating tough, chewy texture instead of delicate crispness.
Egg Function and Temperature
Room temperature eggs incorporate more easily into the dough than cold eggs, creating smoother, more cohesive texture. The eggs provide structure, richness, and help create the characteristic bubbling and blistering during frying. Four large eggs for 500g flour creates properly balanced dough. More eggs would make it too soft, while fewer would create dry, difficult-to-roll dough.
Marsala Wine Character
Marsala, the fortified wine from Sicily, contributes subtle sweetness, complexity, and helps tenderize the dough. The alcohol partially evaporates during frying, leaving behind nuanced flavor that distinguishes crostoli from plain fried dough. It also inhibits gluten development, contributing to a more tender, delicate pastry. Sweet Marsala works best for crostoli, though dry Marsala is acceptable. If unavailable, substitute with vin santo, sweet sherry, grappa, or white wine.
Lemon Zest and the Sugar-Rubbing Technique
The most distinctive step in this recipe is rubbing lemon zest directly into the sugar before building the dough. This technique, used by professional pastry cooks throughout Italy, releases the essential oils locked inside the zest cells and binds them to the sugar granules. The result is lemon-flavored sugar that permeates the dough far more effectively than zest added directly to the flour. Use organic lemons if possible, and zest only the colored outer layer, avoiding the bitter white pith underneath.
Oil Selection for Dough and Frying
Sunflower oil in the dough creates lighter, more delicate texture than butter or lard. For frying, choose neutral oils with high smoke points: sunflower, peanut, or canola oil all work excellently. Avoid olive oil, which has a lower smoke point and can impart strong flavor. The frying oil must reach 175 to 180°C (350 to 360°F) so the dough fries quickly, creating crispy texture without absorbing excessive oil. According to the North American Olive Oil Association, selecting the right oil for each cooking application significantly impacts both flavor and food safety.
Method
Create the Lemon Sugar
1. Rub the zest into the sugar: Place the 4 tablespoons of granulated sugar in a small bowl and add the zest of both lemons. Using your fingertips, rub the zest vigorously into the sugar for approximately one minute. You will feel the mixture become slightly damp and clumping as the essential oils release into the sugar. The sugar should smell intensely of fresh lemon, far more powerfully than the zest alone would suggest.
This step is worth the extra minute it requires. The lemon oils are fat-soluble and bind to the sugar granules, distributing throughout the dough in a way that zest added separately simply cannot replicate. The result is crostoli with genuine, bright lemon character in every bite rather than occasional bursts of citrus where zest concentrates.
Make and Rest the Dough
1. Combine dry ingredients: On a clean work surface or in a large bowl, combine the 500g 00 flour, lemon sugar, and salt. Mix briefly to distribute evenly. If working on a surface, mound the flour mixture and create a well in the center, the classic “fontana” method used throughout Italian dough-making.
2. Add wet ingredients: Crack the 4 eggs into the well. Add the 4 tablespoons sunflower oil and 4 tablespoons Marsala. Using a fork, beat the eggs and liquid ingredients together in the center, gradually incorporating flour from the inner walls of the well. Continue mixing until the dough begins to come together into a shaggy mass.
3. Knead the dough: Once too stiff for a fork, begin kneading by hand on a lightly floured surface for 8 to 10 minutes. Proper kneading is essential as it develops the gluten networks that allow the dough to be rolled extremely thin without tearing. The dough initially feels slightly rough or sticky. Continue kneading, adding minimal flour only if absolutely necessary, as excess flour makes the finished crostoli tough. As you work, the dough transforms progressively: smoother, more elastic, and slightly glossy. After 8 to 10 minutes it should feel silky, stretch easily when pulled, and spring back gently when pressed.
4. Rest the dough: Form the kneaded dough into a smooth ball and wrap tightly in plastic wrap. Let it rest at room temperature for 30 minutes minimum. This resting period is not optional. During rest, the gluten relaxes, making the dough dramatically easier to roll thin. Without rest, the dough springs back constantly, making it nearly impossible to achieve the thinness required for proper crostoli. The dough can rest up to 2 hours at room temperature or overnight in the refrigerator (bring to room temperature before rolling if chilled).
Roll and Cut
1. Divide the dough: Divide the rested dough into 6 to 8 equal portions. Work with one portion at a time, keeping the others covered to prevent drying. Dividing the dough makes rolling more manageable and produces more consistent thinness.
2. Roll very thin: On a lightly floured surface, roll each portion as thin as possible, approximately 1 to 2mm thickness, similar to thin pasta sheets. The dough should be nearly translucent when held up to light. A pasta machine produces exceptionally consistent results: start at the widest setting and work progressively to the second-thinnest setting (setting 6 or 7 on most machines). Thin rolling is crucial. Thick dough produces dense, bready crostoli instead of the delicate, shattering pastries you want. If the dough resists and springs back, rest it for another 5 to 10 minutes before continuing.
3. Cut into shapes: Using a fluted pastry wheel for traditional wavy edges, or a sharp knife for clean cuts, cut the rolled dough into strips approximately 3 to 4cm wide and 10 to 12cm long. Alternatively, cut into diamond shapes of similar dimensions. For the traditional twisted crostoli appearance, cut a small vertical slit approximately 3 to 4cm long in the center of each piece, then pull one end of the dough through this slit and back out, creating a looped shape. Arrange cut pieces on clean kitchen towels or parchment paper without overlapping.
Fry to Perfection
1. Heat the frying oil: Pour oil into a deep, heavy-bottomed pot to a depth of at least 6 to 8cm. The pot should be no more than half-full to prevent overflow. Heat over medium-high to 175 to 180°C (350 to 360°F), monitoring carefully with a thermometer. Correct temperature is non-negotiable for good results. Too cool produces greasy, oil-soaked crostoli, while too hot burns the exterior before the interior sets. The USDA Food Safety and Inspection Service advises careful monitoring of frying temperatures for both food safety and quality.
2. Fry in small batches: Working in batches of 3 to 5 pieces depending on pot size, carefully lower crostoli into the hot oil. Do not overcrowd, as overcrowding drops the oil temperature and causes pieces to stick together. The crostoli immediately bubble and blister, puffing slightly as they fry. Fry for 30 to 60 seconds per side until pale to light golden. Turn once using tongs or a slotted spoon. Watch closely, as they cook extremely quickly due to their thinness and the difference between light golden and burnt is a matter of seconds.
3. Drain thoroughly: Remove fried crostoli from the oil and drain on paper towels or a wire rack set over paper towels. While still warm the crostoli may seem slightly soft, but they crisp completely as they cool. Do not be tempted to return them to the oil.
4. Maintain oil temperature: Between batches, allow the oil to return to 175 to 180°C before adding the next batch. Monitor continuously and adjust heat accordingly.
Finish and Serve
1. Cool completely: Let all crostoli cool completely to room temperature before finishing. Dusting warm crostoli causes the icing sugar to dissolve and melt rather than creating the characteristic snowy coating.
2. Dust generously: Place icing sugar in a fine-mesh sieve and dust the cooled crostoli generously, turning them if desired to coat both sides. Traditional presentation involves piling the sugared crostoli in tall, dramatic mounds on serving platters. They should appear almost snowed on, generous with the sugar rather than lightly sprinkled.
Technical Notes on Success
Several factors determine whether crostoli achieve the proper delicate, crispy texture:
Thin rolling is essential: Thick dough produces heavy, bready results rather than light, shattering pastries. If struggling to roll thin enough by hand, a pasta machine solves the problem completely and produces reliably consistent sheets.
The lemon sugar step matters: Rubbing zest into sugar before incorporating it into the dough is a small step with disproportionate flavor impact. Do not skip it. The difference in lemon intensity between this method and simply adding zest to the flour is significant.
Proper oil temperature: Steady heat between 175 and 180°C throughout frying is the single most important technical factor. A thermometer is not optional equipment here, as guessing oil temperature reliably produces inconsistent results.
Do not overcook: Light golden is the target color, not deep brown. Crostoli continue crisping as they cool, so they should appear slightly underdone when removed from the oil.
Cool completely before sugaring: Warm crostoli cause icing sugar to melt and create sticky, wet coating rather than snowy dusting.
Serving and Storage
Crostoli are best eaten the day they are made, when their texture is at peak crispness. They require no accompaniment beyond the icing sugar coating, though some regions serve them alongside chocolate sauce or honey for dipping. They pair naturally with espresso, cappuccino, sweet wines like Moscato d’Asti, or vin santo.
Stored in airtight containers at room temperature, with layers separated by parchment paper, crostoli keep for up to 3 to 4 days, though they gradually lose crispness as they absorb ambient moisture. Avoid refrigerating, which accelerates softening. If stored crostoli become slightly soft, refresh them in a 150°C (300°F) oven for 3 to 5 minutes, cool, and re-dust with icing sugar if needed.
Regional Variations and Adaptations
While this recipe represents a classic northern Italian approach, the fundamental technique accommodates many variations:
Alcohol substitutions: Grappa, rum, brandy, vin santo, or dry white wine each produce slightly different flavor profiles while serving the same tenderizing function in the dough.
Citrus variations: Replace lemon zest with orange zest, or use a combination of both. Apply the same sugar-rubbing technique regardless of which citrus you choose.
Flavoring additions: Vanilla extract, anise seeds, or fennel seeds each introduce different aromatic character without altering the fundamental technique.
Finishing alternatives: Replace icing sugar with a honey drizzle, a dusting of cocoa powder combined with icing sugar, or a drizzle of melted dark chocolate.
Shape variations: Simple rectangles, bow-ties, large irregular shapes, or the traditional twisted ribbons all work identically. Shape affects only appearance, not flavor or texture.
Cultural Context and Carnival Traditions
Crostoli embody the spirit of Carnevale, the period of indulgence before Lenten sacrifice. In Italian homes and bakeries, the weeks before Ash Wednesday see enormous quantities of these pastries produced and consumed at parties, parades, and family gatherings throughout the country.
The tradition of Carnival fried sweets extends across Catholic Europe: Spanish buñuelos, French beignets, Portuguese filhós, and Polish faworki all share the concept of fried, sugared dough consumed before Lent. While historically tied to Carnival season, crostoli now appear at weddings, baptisms, Christmas celebrations, and any occasion calling for festive sweets.
In Italian homes, making crostoli traditionally becomes a multigenerational family activity. Grandmothers, parents, and children roll, cut, fry, and sugar batch after batch together. The process is as much about the making as the eating, embedding these flavors deeply in family memory and cultural identity.
This crostoli recipe demonstrates how attention to small details, proper dough development, the lemon sugar technique, controlled frying temperature, and thin rolling, transforms simple pantry ingredients into something genuinely special. The combination of crispy, delicate texture, bright lemon character, and wine-infused flavor produces pastries that are simultaneously humble and elegant, connecting those who make and eat them to centuries of Italian celebration and tradition.