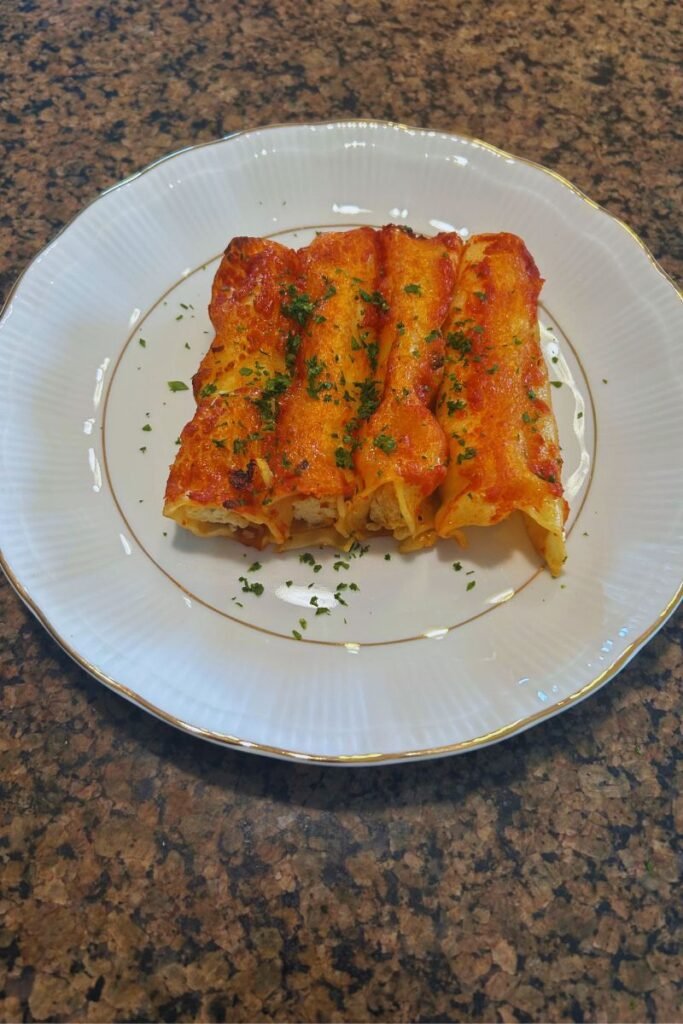
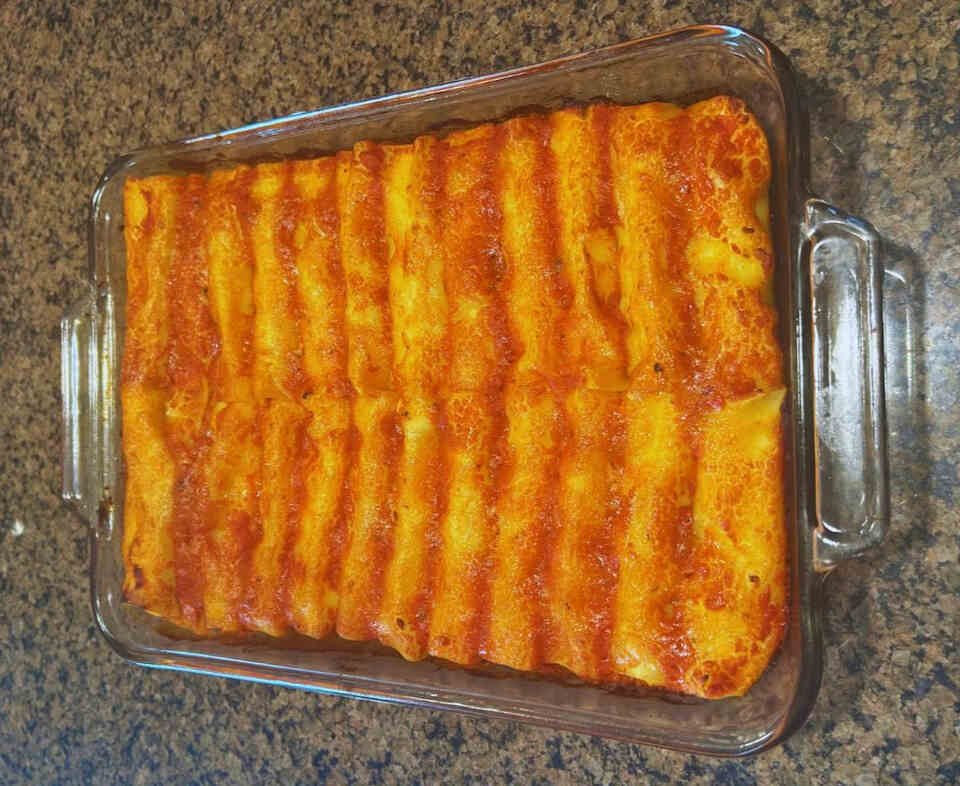
There’s something ridiculously satisfying about pulling a bubbling pan of ricotta and mozzarella cannelloni out of the oven. Those pasta tubes stuffed with creamy ricotta filling, covered in tomato sauce and melted cheese, with butter-crisped edges calling your name. This is cannelloni al forno, baked cannelloni, and it’s the kind of Italian comfort food that makes you understand why people get emotional about their grandmother’s cooking.
This ricotta cannelloni recipe uses a classic cheese filling of ricotta, mozzarella, and Parmigiano that’s rich without being heavy. It’s baked pasta at its finest, traditional Italian recipes that feed a crowd, taste impressive, and actually aren’t that complicated once you get past the filling step. This is Sunday dinner Italian cooking that works for special occasions but doesn’t require culinary school training. 😋
Ingredients
Here’s what you need for this cannelloni al forno. The ingredient list is straightforward, though the quantities are generous, this feeds about 8-10 people or provides plenty of leftovers. This is family-style Italian cooking where abundance matters.
Ingredients for Ricotta and Mozzarella Cannelloni
For the filling:- 1500g (about 6 cups) ricotta cheese
- 3 whole eggs
- 3–4 stems parsley, finely chopped
- Parmigiano cheese, grated (to taste, plus extra for topping)
- 1 handful mozzarella, shredded
- 1 tablespoon breadcrumbs
- Salt and pepper, to taste
- 500g cannelloni tubes (Divella or similar quality brand)
- Tomato sauce, enough to cover (about 3–4 cups)
- 100g butter, cut into cubes
- Extra Parmigiano for sprinkling on top
The massive amount of ricotta creates incredibly creamy filling. 1500g might seem excessive, but you’re filling a lot of tubes and you want them generously stuffed. Use whole milk ricotta for best flavor and texture, low-fat ricotta gets grainy and sad when baked.
Eggs bind the filling and add richness. Parmigiano cheese (not pre-grated, grate it fresh from a wedge) provides salty, nutty depth. The handful of mozzarella adds stretchy, melty goodness. Breadcrumbs absorb excess moisture and help the filling hold together during baking.
Cannelloni tubes come in various brands, but quality matters. Divella is excellent, proper thickness that doesn’t turn mushy during baking. According to Gigi Importing, the quality of pasta can vary significantly by brand, and imported Italian pasta often delivers superior texture and flavor.
Butter cubes scattered on top before baking create those amazing golden, crispy spots everyone fights over. This is traditional technique in Italian baked dishes that adds both flavor and visual appeal. Tomato sauce can be your favorite jarred marinara or homemade, it just needs to be good quality since it’s a primary flavor component.
Substitution options: Can’t find cannelloni tubes? Use manicotti shells (slightly larger but similar). No fresh parsley? Dried works in a pinch, though use less. Want to add spinach? Squeeze it completely dry and mix into the filling. The base recipe tolerates customization while maintaining its essential character.
Step-by-Step Instructions
Let’s make authentic cannelloni. This recipe requires some hands-on time for filling the tubes, but the actual technique is straightforward. Total time is about an hour, with 30-40 minutes being oven time where you’re doing nothing. Perfect for Italian comfort food that impresses without stressing you out.
Step 1: Make the Filling
In a large bowl, combine your ricotta, eggs, chopped parsley, grated Parmigiano, shredded mozzarella, and breadcrumbs. Season generously with salt and pepper.
Mix everything together until smooth and well combined. The mixture should be creamy and cohesive, not grainy or separated. Taste it (yes, raw eggs, but just a tiny taste) and adjust seasoning. The filling should taste well-seasoned on its own because it’s the heart of the dish.
The cheese filling technique here is classic, ricotta provides the base, eggs enrich and bind, hard cheese adds flavor, soft cheese adds melt, breadcrumbs stabilize. This ratio has been perfected over generations of Italian cooks.
Step 2: Fill the Cannelloni
Transfer your ricotta mixture into a piping bag. If you don’t have a piping bag, use a heavy-duty zip-top bag with one corner cut off, or use a small spoon (slower but functional).
Fill each cannelloni tube by piping the filling into both ends until the tube is completely full with no air pockets. Arrange the filled tubes in a single layer in a large baking dish (typically 9×13 inch or similar)(paid link). They should fit snugly but not be crammed, you want tomato sauce to flow around them.
This is the most time-consuming step, but it’s meditative once you get into a rhythm. I usually set up an assembly line: bowl of filling, piping bag, empty tubes, baking dish. Work systematically and you’ll be done before you know it.
Step 3: Add Sauce, Butter & Parmigiano
Pour tomato sauce over the cannelloni, just enough to fully cover them. You don’t want them swimming, but they should be completely blanketed. The sauce keeps the pasta from drying out during baking and adds essential moisture and flavor.
Scatter those butter cubes evenly across the top. They’ll melt during baking and create gorgeous golden spots. Sprinkle a generous layer of grated Parmigiano over the entire surface, covering all visible sauce and cannelloni.
This layering technique, pasta, sauce, butter, cheese, is classic Italian baked pasta construction. Each element serves specific purposes and together they create that perfect golden, bubbling, irresistible top.
Step 4: Bake
Cover the baking dish tightly with aluminum foil. Bake at 375°F (190°C) for 30 minutes. The foil traps steam, ensuring the pasta tubes cook through without the top burning.
After 30 minutes, remove the foil and switch your oven to broil. Broil until the top becomes lightly golden and bubbling, about 3-5 minutes. Watch carefully, broilers vary in intensity and you want golden, not charred.
The cannelloni al forno should emerge from the oven bubbling at the edges, with a golden-brown top and an aroma that makes everyone immediately appear in the kitchen asking “when’s dinner?”
Step 5: Rest & Serve
Let the cannelloni rest for 10 minutes before serving. This isn’t optional, the filling needs time to set up slightly or it’ll ooze everywhere when you cut portions. The rest also prevents mouth-burning from molten cheese.
Serve with extra grated Parmigiano on the table for people to add as desired. Use a large spoon or spatula to lift portions, getting some of that crispy edge on each serving if possible.
This is traditional Italian pasta meant to be served family-style at the table, with everyone helping themselves. Crusty bread for sauce-mopping is basically mandatory. A simple green salad provides textural contrast to all that rich, creamy pasta.
Tips & Variations
This ricotta cannelloni recipe is fairly traditional, but here are some insights and variations worth knowing.
Filling variations: Add cooked, squeezed-dry spinach for classic cannelloni verdi. Mix in cooked Italian sausage (removed from casings) for meaty cannelloni. Add nutmeg (just a pinch) to the filling for traditional Italian seasoning. Some cooks add lemon zest for brightness.
Sauce options: Simple marinara works great, but you could use meat sauce (ragù), pink sauce (marinara with cream), or even béchamel for cannelloni bianco. Each sauce creates a different dish character while using the same filled tubes.
Make ahead: Assemble the cannelloni completely, cover tightly, and refrigerate up to 24 hours before baking. Add 5-10 minutes to the covered baking time since you’re starting from cold. This makes it perfect for entertaining, all the work happens ahead, you just pop it in the oven before guests arrive.
Freezing: Cannelloni freezes beautifully. Assemble completely, wrap tightly in plastic then foil, and freeze up to 3 months. Bake from frozen, adding 15-20 minutes to covered baking time. The filling and pasta both handle freezing without texture degradation.
Piping bag alternatives: No piping bag? Use a zip-top bag with the corner cut off. Still too awkward? Use a small spoon to stuff the tubes, it’s slower but totally functional. Some people use their fingers to push filling in from both ends.
Pasta options: Can’t find cannelloni? Large manicotti shells work similarly. Some cooks use fresh lasagna sheets rolled around filling, though that’s technically manicotti rather than cannelloni. Dried tubes are traditional and easier.
Butter alternatives: Olive oil can replace butter, though you lose those amazing golden butter spots. Some cooks use both, olive oil drizzled over everything, plus butter cubes for browning.
Common mistakes: Underfilling tubes (they look sad and deflated), using too much sauce (pasta gets soggy), skipping the rest time (filling oozes everywhere), overcooking under foil (pasta gets mushy). Avoid these and you’re golden.
Why This Recipe Works
There’s a reason baked cannelloni has been an Italian Sunday dinner staple for generations. The technique and flavors just work beautifully together.
The filling is perfectly balanced. Ricotta provides creamy base without being heavy. Eggs add richness and bind everything. Parmigiano brings salty depth. Mozzarella creates that essential cheese pull. Together they’re greater than the sum of parts.
Baking melds everything together. The pasta tubes soften and absorb sauce flavor. The filling sets and develops deeper flavor through gentle heat. The sauce reduces and concentrates. Everything unifies into cohesive deliciousness.
It’s actually easier than lasagna. Controversial opinion maybe, but I find cannelloni simpler than layering lasagna. Fill tubes, arrange in pan, add sauce and cheese, bake. No careful layering, no worrying about sheet pasta alignment.
It feeds a crowd economically. Ricotta, pasta, sauce, cheese. You’re feeding 8-10 people heartily for under $20. This is budget-friendly Italian cooking that looks and tastes expensive.
Leftovers are fantastic. Cannelloni reheats beautifully and arguably tastes better the next day after flavors have melded. Individual portions microwave well or you can reheat in the oven. Make extra on purpose.
It’s impressive without being difficult. Serve this at a dinner party and people think you slaved all day. Reality: maybe 30 minutes of active work, mostly just filling tubes. The oven does the hard work while you drink wine.
The butter-crisped top is magic. Those golden, slightly crunchy bits where butter and cheese have browned? That’s the part everyone fights over. It’s textural contrast to the creamy filling and it’s absolutely essential to the dish.
Conclusion
This baked ricotta and mozzarella cannelloni proves that Italian comfort food can be both traditional and totally achievable for home cooks. It’s cannelloni al forno that looks like restaurant-quality food but uses straightforward technique and accessible ingredients.
The beauty of traditional Italian recipes like this is how they’ve been refined over generations into optimal versions. The ricotta-based filling, the covered-then-uncovered baking, the butter cubes on top, these aren’t random choices. They’re tested, proven techniques that create reliable excellence.
Want to make something impressive for Sunday dinner? Make this. Need family-style Italian food that scales for crowds? This is it. Looking for baked pasta that actually tastes better as leftovers? You’ve found it.
The cheese filling here is creamy, flavorful, and satisfying without being overwhelmingly heavy. The pasta tubes provide structure and texture. The tomato sauce adds moisture and acidity. The butter-cheese top delivers those crispy, golden bits everyone loves. Everything works together in perfect Italian baked dishes harmony.
Make this for your next gathering. Assemble it ahead so you’re not stressed when guests arrive. Pull that bubbling, golden pan from the oven and bask in the compliments. Serve it with crusty bread, simple salad, and good wine. This is the food memories are made of.
Try it, enjoy it, and appreciate that you’ve made authentic cannelloni al forno that would make Italian grandmothers nod approvingly. That’s a pretty great achievement.