Look, I’m going to level with you right from the start. Crème brûlée has this fancy French reputation that makes people think it’s impossible to make at home. But here’s the truth: it’s literally eggs, cream, and sugar. That’s it. The most complicated part is pronouncing it correctly at dinner parties.
I’ve made this recipe probably fifty times, and I’ve messed it up in every way imaginable. Scrambled eggs mixed with cream? Done that. A soggy, watery mess instead of silky custard? Been there. A burnt sugar top that tastes like an ashtray? Yep, nailed that one too. But after all those disasters, I’ve figured out exactly what works and what doesn’t.
This vanilla crème brûlée is the real deal. It’s got that perfect contrast between the crackling caramelized sugar shell and the smooth, creamy custard underneath. And the best part? You don’t need any special skills or fancy equipment (okay, a kitchen torch helps, but I’ll give you workarounds).
Ingredients You’ll Need
Ingredients for Vanilla Crème Brûlée
- Heavy cream (35% fat) — 500g
- Egg yolks, room temperature — 6 yolks
- Sugar — 100g (plus extra for caramelizing)
- Vanilla extract or vanilla bean (2–3 beans) — 7g
- Salt — 2g
Let’s talk about what goes into this magical dessert. The ingredient list is short, but quality matters here.
Heavy cream (35% fat) — 500g: This is your base, and it’s non-negotiable. Don’t even think about substituting half-and-half or milk. You need the fat content for that silky texture. Go full-fat or go home.
Egg yolks, room temperature — 6 yolks: Room temperature is key here. Cold eggs don’t emulsify properly, and you’ll end up with a grainy texture. Take them out of the fridge about an hour before you start. Save those egg whites for meringues or an omelet tomorrow.
Sugar — 100g: This goes into the custard itself. You’ll need extra sugar later for that iconic caramelized top, but we’ll get to that.
Vanilla extract or vanilla bean (2-3 beans) — 7g: Real vanilla makes a massive difference. If you’re using extract, get the good stuff, not imitation vanilla that tastes like chemicals. If you’re using vanilla beans, scrape out those seeds and toss the pod into the cream while it heats. The flavor is incredible.
Salt — 2g: Just a pinch to balance the sweetness and enhance all the other flavors. Don’t skip it.
Before You Start: What You Need to Know
Crème brûlée is all about technique and patience. You can’t rush this dessert, and honestly, that’s part of its charm. Here’s what you need to understand before you start.
Water baths are your friend. Baking custard directly in the oven dries it out and makes it rubbery. The water bath (or bain-marie if you want to sound fancy) creates gentle, even heat that cooks the custard perfectly. According to culinary science experts, this method prevents the eggs from curdling and ensures that creamy texture.
Tempering is crucial. When you add hot cream to raw eggs, you can’t just dump it all in at once. You’ll make sweet scrambled eggs, which is gross in this context. Tempering means adding the hot liquid gradually while whisking constantly. This slowly raises the temperature of the eggs without cooking them into chunks.
Overnight chilling isn’t optional. I know you want to eat this immediately, but custard needs time to set properly. Six hours minimum, overnight is better. The texture transforms as it chills, going from loose and jiggly to firm and silky.
Step-by-Step Instructions (The Real Way)
Alright, let’s make some crème brûlée. Follow these steps exactly, and you’ll be golden.
Step 1: Preheat and Prep
Preheat your oven to 325°F (160°C). This temperature is lower than most baking, and that’s intentional. High heat cooks custard too fast and makes it grainy.
Get your ramekins ready. You’ll need about 4-6 ramekins depending on their size. Traditional crème brûlée ramekins are shallow and wide, which gives you more surface area for that caramelized sugar crust. But honestly, any oven-safe ceramic dish works.
Step 2: Mix the Egg Mixture
In a medium bowl, add your 6 egg yolks and 100g of sugar. Whisk them together until smooth and slightly pale. You don’t need to whip them into a frenzy, just combine them well. The mixture should be thick and uniform with no streaks of unmixed egg.
This is also a good time to prep your water bath. Find a baking dish large enough to hold all your ramekins with space between them. You’ll fill this with hot water later.
Step 3: Heat the Cream
In a pot, combine your heavy cream, vanilla, and salt. If you’re using vanilla beans, split them lengthwise, scrape out the seeds, and add both the seeds and the pods to the cream. The pods infuse extra flavor as the cream heats.
Heat the mixture over medium heat, stirring occasionally. You want to bring it to a scald, which means just before boiling. You’ll see steam rising and tiny bubbles forming around the edges. Professional pastry chefs recommend scalding dairy to help the custard set properly and develop the best flavor. Don’t let it actually boil or you’ll lose some of that cream to evaporation.
Step 4: Temper the Eggs
Here’s where people usually mess up, so pay attention. You need to slowly add the hot cream to the egg mixture while whisking constantly. I mean constantly. Don’t stop whisking.
Start by adding just a small splash of hot cream to the eggs while whisking vigorously. This warms up the eggs gradually. Then add another splash. And another. After you’ve added about a third of the cream this way, you can pour in the rest a bit faster, but keep whisking the whole time.
Why so careful? If you dump hot liquid into raw eggs all at once, the eggs cook instantly and you get chunky scrambled egg bits floating in your cream. Not the vibe we’re going for.
Step 5: Prepare the Ramekins
Pour the custard mixture into your ramekins, filling them almost to the top. Leave about 1/4 inch of space at the rim.
Now here’s a pro trick: use a kitchen blowtorch to lightly pass over the surface of each custard. This pops any air bubbles that formed during pouring. If you don’t have a torch yet (you’ll need one later anyway), just skim off any foam or bubbles with a spoon.
Place the filled ramekins into your baking dish. Then carefully fill the baking dish with hot water until it comes about halfway up the sides of the ramekins. Be careful not to splash water into the custard.
Step 6: Bake Low and Slow
Slide the whole setup into your preheated 325°F oven. Bake for about 40 minutes, but start checking at 35 minutes. Every oven is slightly different, so timing varies.
You’re looking for custards that are set around the edges but still jiggle slightly in the center when you gently shake the pan. They should look like barely-set Jello. The center will continue cooking from residual heat as they cool, so don’t wait until they’re completely firm or you’ll overcook them.
If the edges start browning or the custard develops bubbles on top, your oven is too hot. Lower the temperature by 25°F and adjust your timing.
Step 7: Cool and Chill
Remove the ramekins from the water bath carefully. They’re hot and slippery, so use tongs or a towel. Let them cool on a wire rack for about 30 minutes at room temperature.
Once they’ve cooled down, cover each ramekin with plastic wrap and transfer them to the refrigerator. Now comes the hard part: waiting. You need to chill them for at least 6 hours, but overnight is ideal. This is when the custard fully sets and develops that perfect creamy texture.
I usually make these the night before I plan to serve them. It takes the pressure off and ensures they’re perfectly chilled.
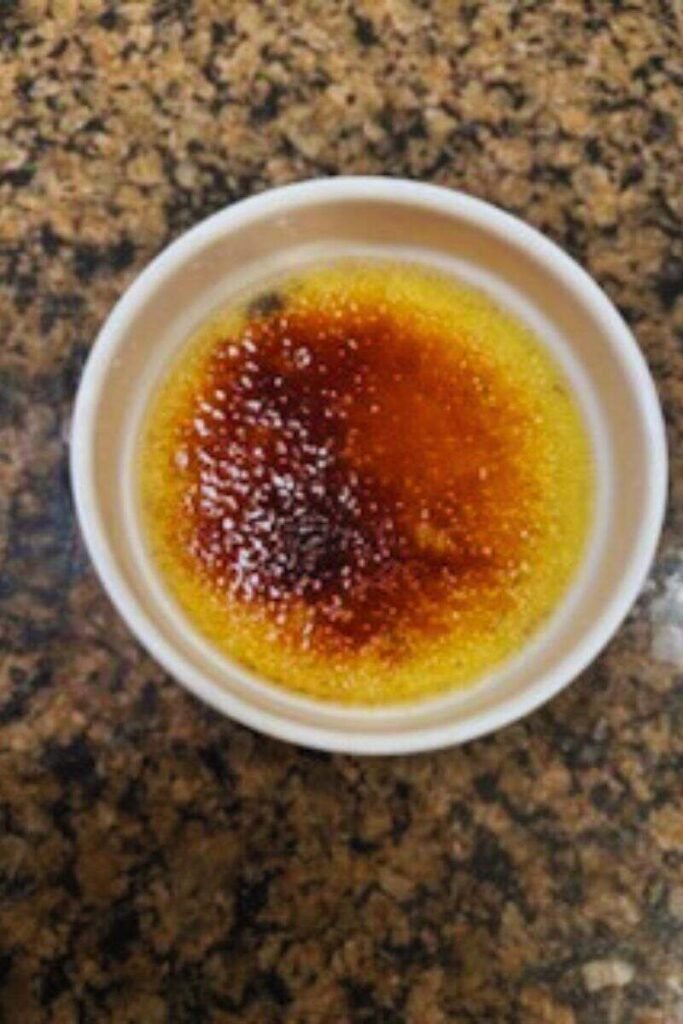
Step 8: Caramelize the Sugar
This is the moment of truth, the part that makes crème brûlée iconic. Right before serving, sprinkle an even layer of sugar over the top of each custard. About 1-2 tablespoons per ramekin, depending on size. Use granulated white sugar or superfine sugar for best results.
Now grab your kitchen torch. Hold it about 4-5 inches above the sugar and move it in circular motions. The sugar will start to melt, bubble, and turn golden brown. Keep going until you get a deep amber color. Don’t be scared of going a bit dark—that’s where the best flavor is. The sugar will harden into a glass-like shell as it cools.
Don’t have a torch? You can use your oven’s broiler, but it’s trickier. Place the ramekins on a baking sheet and put them as close to the broiler as possible. Watch them like a hawk—sugar goes from perfect to burnt in seconds under a broiler. Rotate the pan if needed for even caramelization.
Let the sugar cool for a minute or two until it hardens completely. That satisfying crack when you tap it with a spoon? That’s what you’re after.
Common Mistakes and How to Avoid Them
Let me save you from the disasters I’ve experienced. Here’s what not to do.
Don’t skip the water bath. I tried baking these without it once because I was lazy. The edges overcooked while the centers stayed liquid. The water bath is essential for even, gentle cooking.
Don’t overbake. Custard keeps cooking after you remove it from the oven. If you wait until the center is completely firm, you’ll end up with rubbery, overcooked custard. Pull them when they still jiggle.
Don’t torch the sugar too far in advance. The caramelized sugar starts to soften and lose its crunch after about 30 minutes. Torch right before serving for maximum impact.
Don’t use a shallow water bath. The water needs to come at least halfway up the sides of the ramekins. Too little water doesn’t provide enough insulation and your custards will cook unevenly.
Don’t rush the chilling. I know you’re excited, but warm custard doesn’t have the right texture. It needs that long chill time to set properly. Plan ahead.
Tips for Perfect Crème Brûlée Every Time
Want to level up your crème brûlée game? Here’s some insider knowledge.
Use vanilla beans when you can. Extract works fine, but real vanilla beans add visual appeal (those little black specks) and deeper flavor. They’re expensive, but for special occasions, totally worth it.
Strain the custard before pouring. After tempering, pour the custard through a fine-mesh strainer into a large measuring cup with a spout. This removes any bits of cooked egg or vanilla pod and makes pouring into ramekins way easier.
Try different sugars for the topping. Granulated white sugar is classic, but demerara or turbinado sugar adds a deeper caramel flavor. Superfine sugar melts faster and more evenly under the torch.
Invest in a good kitchen torch. Those little cooking torches from the hardware store work better than the tiny ones sold as “crème brûlée torches.” You want something with decent power.
Make extra. This recipe is easily doubled, and crème brûlée keeps in the fridge for 3-4 days before torching. Make a big batch and you’ve got impressive desserts ready to go all week.
Frequently Asked Questions
Can I make this without a torch?
Yes, but it’s not ideal. Use your oven’s broiler on high and watch carefully. The custard might warm up a bit, which isn’t great, but you’ll still get caramelized sugar.
Can I use milk instead of heavy cream?
You could, but it won’t be crème brûlée anymore. It’ll be… milk custard? The high fat content in heavy cream is what makes this dessert rich and luxurious. Don’t sabotage yourself.
How do I know when it’s done baking?
Gently shake the baking dish. The edges should be set and firm, but the center should still wobble like Jello. If the whole thing is firm, it’s overbaked.
Can I flavor this with something other than vanilla?
Absolutely. Steep citrus zest, coffee beans, or lavender in the cream before adding it to the eggs. Just strain it out before combining with the eggs. Chocolate crème brûlée is also amazing—add melted dark chocolate to the warm cream.
Why is my custard grainy?
Either you didn’t temper the eggs properly and scrambled them slightly, or you overbaked the custard. Make sure to add the hot cream slowly and pull the custards from the oven while they still jiggle.
How far ahead can I make these?
The custards can be made and chilled up to 3 days in advance. Only torch the sugar right before serving, though. The caramelized crust doesn’t hold up well over time.
Conclusion: You’ve Got This
Here’s the truth: crème brûlée sounds way fancier than it actually is. Once you understand the basic technique—tempering eggs, baking in a water bath, chilling properly—it becomes pretty straightforward. The hardest part is waiting for them to chill overnight.
I love making these for dinner parties because they’re mostly hands-off and you do all the work ahead of time. Then you get to show off with the dramatic torch action right before serving. Guests always think you’re some kind of culinary genius, when really you just followed directions and had patience.
The contrast between that crispy, caramelized sugar shell and the smooth, creamy vanilla custard underneath is genuinely one of the best textures in dessert. It’s worth the effort, worth the wait, and worth impressing your friends and family with your newfound pastry skills.
Now go make some crème brûlée. Your kitchen torch is waiting 🙂