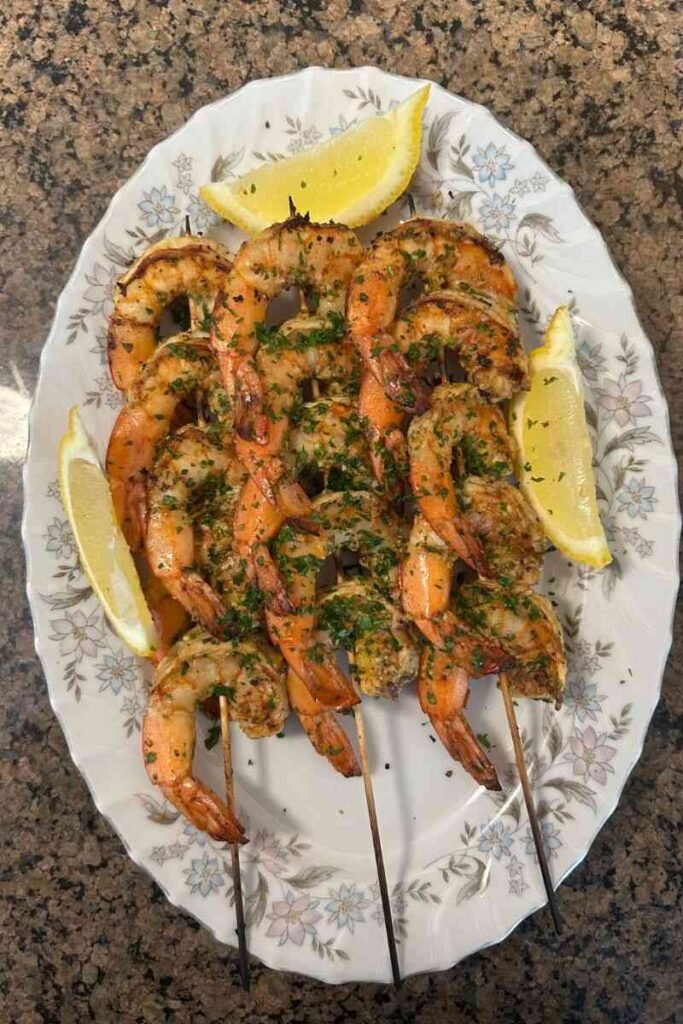
I made these Lemon-Garlic Shrimp Skewers for a backyard barbecue last summer, and honestly? They disappeared faster than I could cook them. People were literally hovering around the grill asking when the next batch would be ready. One friend took a bite, closed his eyes, and said “This is what summer tastes like.” Dramatic? Maybe. Accurate? Absolutely.
Here’s the thing about shrimp skewers: when they’re bad, they’re rubbery, bland, and disappointing. When they’re good—really good—they’re juicy, flavorful, and the kind of dish people remember months later. This lemon-garlic version hits that perfect sweet spot where bright citrus meets savory garlic, with just enough heat to keep things interesting. Plus, they cook in literally five minutes, which means more time enjoying your meal and less time stuck at the grill. 😋
What You’ll Need
Ingredients for Lemon-Garlic Shrimp Skewers
For the Shrimp:- 17-20 large shrimp, peeled and deveined
- Wooden or metal skewers
- 4 garlic cloves, finely chopped
- Large handful fresh parsley, finely chopped
- 4 tbsp extra-virgin olive oil
- Pinch of chili flakes
- 1 tsp paprika
- ½ tsp freshly cracked black pepper
- Zest from 1 whole lemon
- Juice from ½ lemon
- Salt (added right before cooking, not in the marinade)
The ingredient list is short, which means quality matters. Use fresh garlic, not the pre-minced stuff in jars. Fresh parsley, not dried. Good olive oil that you’d actually want to taste. According to research published in Food Quality and Safety, marinades containing citric acid, garlic, and herbs can improve both the safety and sensory qualities of seafood products.
Kitchen Tools You’ll Need
A mixing bowl, a sharp knife for chopping, a zester or microplane for the lemon, tongs for flipping, and skewers. If you’re using wooden skewers, soak them in water for 20-30 minutes before threading to prevent burning. Metal skewers skip this step but get incredibly hot, so have a towel ready for handling them.
A grill or grill pan works best for that charred flavor, but a regular skillet on high heat absolutely works too. I’ve made these both ways and they’re excellent either way—the grill just adds smokiness that takes them to the next level.
Step 1: Make the Marinade (No Salt Yet!)
In a mixing bowl, combine your olive oil, finely chopped garlic, chopped parsley, chilli flakes, paprika, black pepper, lemon zest, and lemon juice. Stir everything together until it’s well mixed and smells absolutely incredible.
Notice what’s missing? Salt. This is crucial and I’ll explain why in a minute, but for now, trust me and leave the salt out of the marinade. Lemon zest is key here—it provides concentrated citrus flavor without the acidity that would cook the shrimp prematurely. Use a microplane or fine grater and only get the yellow part, not the white pith underneath which is bitter.
The garlic should be finely chopped, not crushed or pressed. You want distinct pieces that will stick to the shrimp and create little flavor bombs. Paprika adds color and a subtle sweetness, while chilli flakes provide just enough heat without overwhelming the other flavors.
Black pepper should be freshly cracked if possible. Pre-ground pepper loses volatile oils quickly and tastes flat by comparison. Parsley isn’t just garnish here—it’s actually a significant flavor component that adds herbaceous brightness. Chop it fine enough that it distributes evenly but not so fine that it turns to mush.
Step 2: Marinate the Shrimp (Timing Matters)
Toss your peeled and deveined shrimp in the marinade, making sure each piece gets coated. Use your hands or tongs to really work the marinade into every shrimp. You want that garlic and lemon zest clinging to the surface.
Rest for 15-20 minutes. Not longer. This is important—shrimp are delicate and the acid in the lemon juice will start “cooking” them if you marinate too long. Research on acid-marinated seafood published in Foods found that organic acids like citric and lactic acid cause protein denaturation in shrimp, affecting both texture and color. While this is desirable in some dishes like ceviche, for grilled shrimp we want to control this effect by limiting marinade time.
I usually prep my marinade, toss the shrimp, then use those 15-20 minutes to prep sides or set the table. By the time everything else is ready, the shrimp are perfectly marinated and ready to cook. Room temperature is fine for this short marinade period—you’re not leaving them out long enough for safety concerns.
Step 3: Season Before Grilling (The Salt Secret)
Here’s where that salt comes in. Right before threading onto skewers or putting on the grill, sprinkle salt over the shrimp and give them a quick toss. Not a ton of salt—maybe ½ teaspoon for this quantity—but enough to season them properly.
Why wait until now? Salt draws moisture out of protein through osmosis. If you salt shrimp in the marinade and let them sit, they’ll release liquid, which dilutes the marinade and makes the shrimp less juicy. Salting right before cooking seasons them without this moisture loss.
According to the Effect of Salting Process on Fish Quality study, changes in salt concentration and salting time influence moisture content and water‑holding capacity in fish, which affects texture and overall quality.
This might seem fussy, but it makes a genuine difference. I’ve tested this both ways multiple times, and the shrimp salted at the last minute are consistently juicier and more flavorful than those salted earlier. It’s one of those small technique adjustments that separates good from great.
Step 4: Skewer the Shrimp (Assembly Time)
Thread 4-5 shrimp per skewer, depending on their size and your skewer length. I thread mine so they lay flat—pierce through the thick end near the tail, then through the head end. This creates a C-shape that sits flat on the grill and cooks evenly.
Some people thread shrimp straight through the middle, which is fine but makes them harder to flip and can lead to uneven cooking. The flat method ensures both sides get equal heat exposure and those beautiful grill marks we’re after.
If you’re using wooden skewers, make sure they were properly soaked. Burnt skewers aren’t just unsightly—they’re annoying to handle and can leave ash on your food. Metal skewers eliminate this problem but conduct heat, so handle them carefully or use the ends.
Don’t overcrowd the skewers. Leave a tiny bit of space between each shrimp so heat can circulate. Shrimp packed too tightly steam rather than grill, which defeats the purpose of cooking them this way.
Step 5: Cook (The Easy Part)
For grilling: Preheat your grill to medium-high heat. Oil the grates lightly to prevent sticking. Grill for 2-3 minutes per side until the shrimp are pink, opaque, and have nice char marks. Don’t walk away—shrimp cook incredibly fast and the difference between perfect and overcooked is maybe 30 seconds.
For pan cooking: Heat a large skillet over medium-high. Add a touch of oil if your pan isn’t well-seasoned. Cook for 2 minutes per side until pink and lightly charred. You might need to work in batches if your pan isn’t large enough to hold all skewers at once.
You’ll know shrimp are done when they turn from gray-translucent to pink-opaque and form a C-shape. If they curl into tight Os, you’ve overcooked them slightly (still edible, just not quite as tender). The internal temperature should hit 120-145°F, but honestly, visual cues are more reliable than thermometers for something this small and fast-cooking.
That light char is what you’re after—spots of caramelization that add smokiness and visual appeal. The lemon and garlic in the marinade will brown beautifully, creating these little crispy bits that are basically flavor explosions.

Pro Tips From Someone Who’s Made These Dozens of Times
Buy shrimp already peeled and deveined unless you enjoy tedious prep work. Life’s too short. The pre-prepped shrimp cost slightly more but save significant time and frustration.
Size matters. Large shrimp (21-25 count per pound) work best for skewers. Anything smaller cooks too quickly and is hard to thread. Anything larger is expensive and can be tough if overcooked even slightly.
Don’t skip the lemon zest. It provides concentrated citrus flavor that plain juice can’t match. The oils in the zest contain aromatic compounds that make everything smell and taste better.
The marinade makes great bread-dipping sauce afterward. Seriously. I usually double the marinade recipe, use half for the shrimp, and save half for dipping crusty bread. Just make sure you use the half that didn’t touch raw shrimp, obviously.
Timing is everything. These cook so fast that you should have everything else ready before you start. Set the table, prep your sides, pour the wine—then cook the shrimp last so they hit the table hot and perfect.
What to Serve With Lemon-Garlic Shrimp Skewers
These shrimp are substantial enough to be a main course but also work perfectly as an appetizer. For a complete meal, I usually serve them with rice pilaf or couscous, a simple green salad, and grilled vegetables like zucchini or bell peppers.
Crusty bread is non-negotiable IMO. You need something to soak up that lemon-garlic oil on the plate. A simple baguette or ciabatta works perfectly. Garlic bread feels like overkill since there’s already garlic on the shrimp, but I won’t judge if you go there anyway 🙂
Wine-wise, crisp whites work beautifully. Sauvignon Blanc, Pinot Grigio, or unoaked Chardonnay all complement the citrus and garlic without overwhelming the delicate shrimp flavor. If you prefer red, go very light—maybe a chilled Pinot Noir.
Variations and Customizations
Make it spicier: Double or triple the chilli flakes, or add fresh sliced jalapeños to the marinade. Some people add a pinch of cayenne for extra kick.
Herb variations: Swap parsley for cilantro or basil for a different flavor profile. Dill works surprisingly well with the lemon. Oregano makes it more Mediterranean.
Add vegetables: Thread cherry tomatoes, bell peppers, or red onion chunks between the shrimp on the skewers. Just remember vegetables take longer to cook than shrimp, so either par-cook them first or choose quick-cooking options.
Different citrus: Lime instead of lemon creates a more Mexican-inspired flavor. Orange zest adds subtle sweetness. Mix citrus types for complexity.
Butter-basted version: After grilling, brush skewers with melted butter mixed with more garlic and parsley. This makes them even richer and more indulgent.
Storing and Reheating Leftovers
Honestly, you probably won’t have leftovers. But if you do, they keep in the fridge for 2-3 days in an airtight container. Remove them from the skewers first for easier storage and more even cooling.
Reheating tips: The microwave works but tends to make shrimp rubbery. Better option: sauté briefly in a pan with a touch of olive oil or butter until just warmed through. Even better: eat them cold in a salad. Chilled shrimp with mixed greens, avocado, and a light vinaigrette is legitimately delicious.
You can technically freeze cooked shrimp, but they lose texture and moisture. I don’t recommend it. If you want to prep ahead, freeze the raw marinated shrimp instead (without salt), then thaw and cook fresh when ready.
Why This Recipe Works
The magic here is in the technique as much as the ingredients. Marinating without salt preserves moisture. Adding acid through both juice and zest layers citrus flavor without making the shrimp mushy. High heat for short time creates char while keeping the interior tender and juicy.
Shrimp are mostly protein and water with very little fat. This makes them prone to drying out and getting tough if overcooked. The quick cooking time combined with the oil-based marinade provides just enough protection to keep them moist while developing exterior flavor and color.
The garlic and lemon combination is classic for a reason—they’re complementary flavors that enhance seafood without masking its natural sweetness. Research published in Food Chemistry demonstrated that combining phytic acid and lactic acid in shrimp marinades significantly improved both texture and color retention, showing how acid combinations in marinades create synergistic effects on seafood quality.
The Summer Barbecue Story
That barbecue where these disappeared so fast? I’d planned to make three batches throughout the evening. I ended up making seven because people kept asking for more. My friend Sarah, who claims to not like seafood, ate an entire skewer standing by the grill and then asked if I was selling the recipe.
I’m not selling it—I’m giving it to you for free because good food should be shared. These shrimp have become my signature dish for outdoor gatherings. They’re easy enough that I don’t stress about making them, impressive enough that people think I worked way harder than I did, and delicious enough that I never have to worry about leftovers.
Final Thoughts
Look, I’m not going to pretend these shrimp skewers are revolutionary or that I invented anything here. Lemon-garlic shrimp is about as classic as it gets. But sometimes classic combinations exist for good reasons, and this is one of those times.
What makes this recipe special is the technique—that salt timing, the proper marinating duration, the high-heat cooking method. These small details add up to shrimp that are consistently juicy, flavorful, and beautifully caramelized. It’s the difference between shrimp you eat because they’re there and shrimp you actively crave.
The first time I made these following this exact method, I was genuinely surprised at how much better they were than my previous attempts. The texture was different—firmer but not tough, juicy but not watery. The flavor penetrated throughout instead of just sitting on the surface. Small changes, big impact.
So fire up that grill (or heat up that pan), grab some shrimp, and make these. Invite some friends over. Pour some wine. Enjoy the fact that you’re about to eat something that tastes way more complicated than the effort required. That’s the best kind of cooking—impressive results, minimal stress.
And when someone asks you for the recipe, share it. Good food creates good memories, and good memories are meant to be spread around.
Now if you’ll excuse me, writing about these shrimp has made me hungry, and I happen to have some in the freezer. See you at the grill.