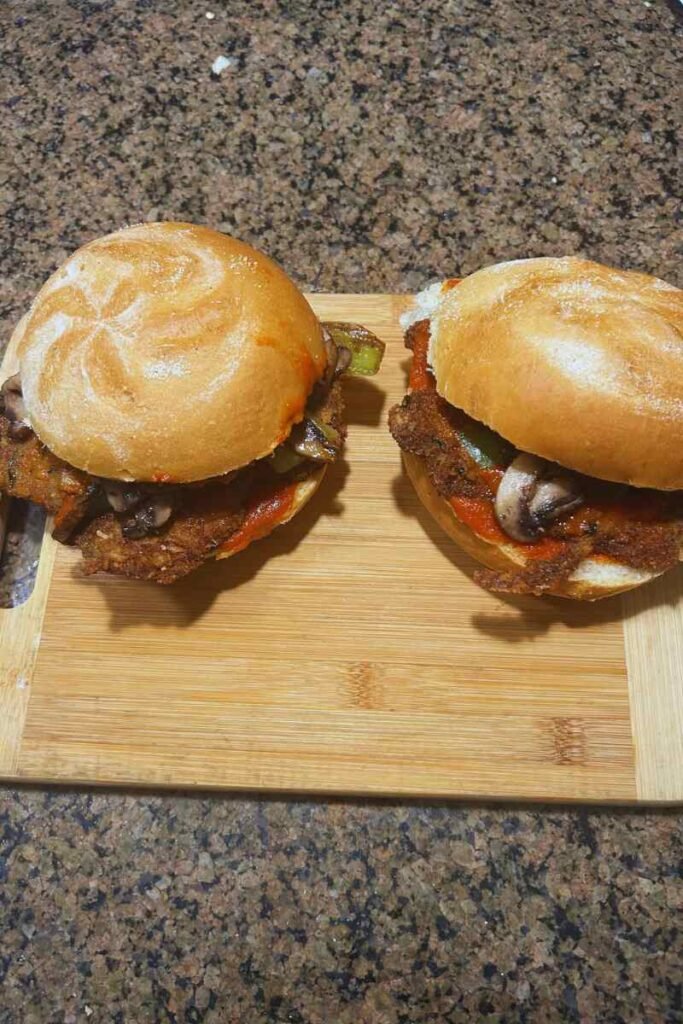
This Italian-American sandwich elevates the classic veal cutlet into a Veal Cutlet Sandwich with Mushrooms by pairing crisp breaded veal with a layered tomato sauce enriched with sautéed mushrooms and cubanelle peppers. The combination creates a complete, satisfying meal where crunchy cutlet meets savory-sweet sauce, all tucked into a toasted kaiser roll that holds up to the moisture while adding its own wheaty flavor and soft yet sturdy texture.
Understanding the Components
The success of this sandwich relies on balancing textures and temperatures. The veal cutlet must remain crispy despite contact with sauce, requiring proper breading technique and strategic assembly timing. The sauce needs sufficient body to cling to the meat without making the bread soggy, achieved through proper reduction and vegetable preparation. The kaiser roll must be sturdy enough to hold everything together while contributing pleasant chew rather than becoming a mere wrapper.
Cubanelli peppers, also called Italian frying peppers, offer sweet, mild flavor with thin walls that soften quickly during cooking. They’re lighter and less vegetal than bell peppers, with subtle sweetness that complements tomato sauce without overwhelming other ingredients. These peppers are traditional in Italian-American cooking, particularly in preparations from Italian immigrant communities in the northeastern United States.
Ingredients
Ingredients for Veal Cutlet Sandwich with Mushrooms and Cubanelle
For the Tomato Sauce- 2–3 tablespoons olive oil
- ¼ medium onion, finely diced (about 40–50g)
- 2 bay leaves
- 300ml passata (strained tomato purée)
- Salt and freshly ground black pepper to taste
- Pinch of sugar (optional, to balance acidity)
- 2 tablespoons olive oil
- 200g mushrooms, sliced
- 2 cubanelli peppers, seeded and sliced
- 1 sprig fresh rosemary
- 2–3 sprigs fresh thyme
- Salt to taste
- 4 veal cutlets (about 400–500g total), pounded thin
- 150g breadcrumbs (plain or Italian-seasoned)
- 40g Parmesan cheese, finely grated
- 2 tablespoons fresh parsley, finely chopped
- Salt and freshly ground black pepper to taste
- 2 eggs, beaten (for egg wash)
- Vegetable or olive oil for frying
- 4 kaiser rolls
- Additional grated Parmesan for topping
- Fresh parsley, chopped, for garnish
- French fries (optional side)
Ingredient Selection and Preparation
Veal Quality and Preparation
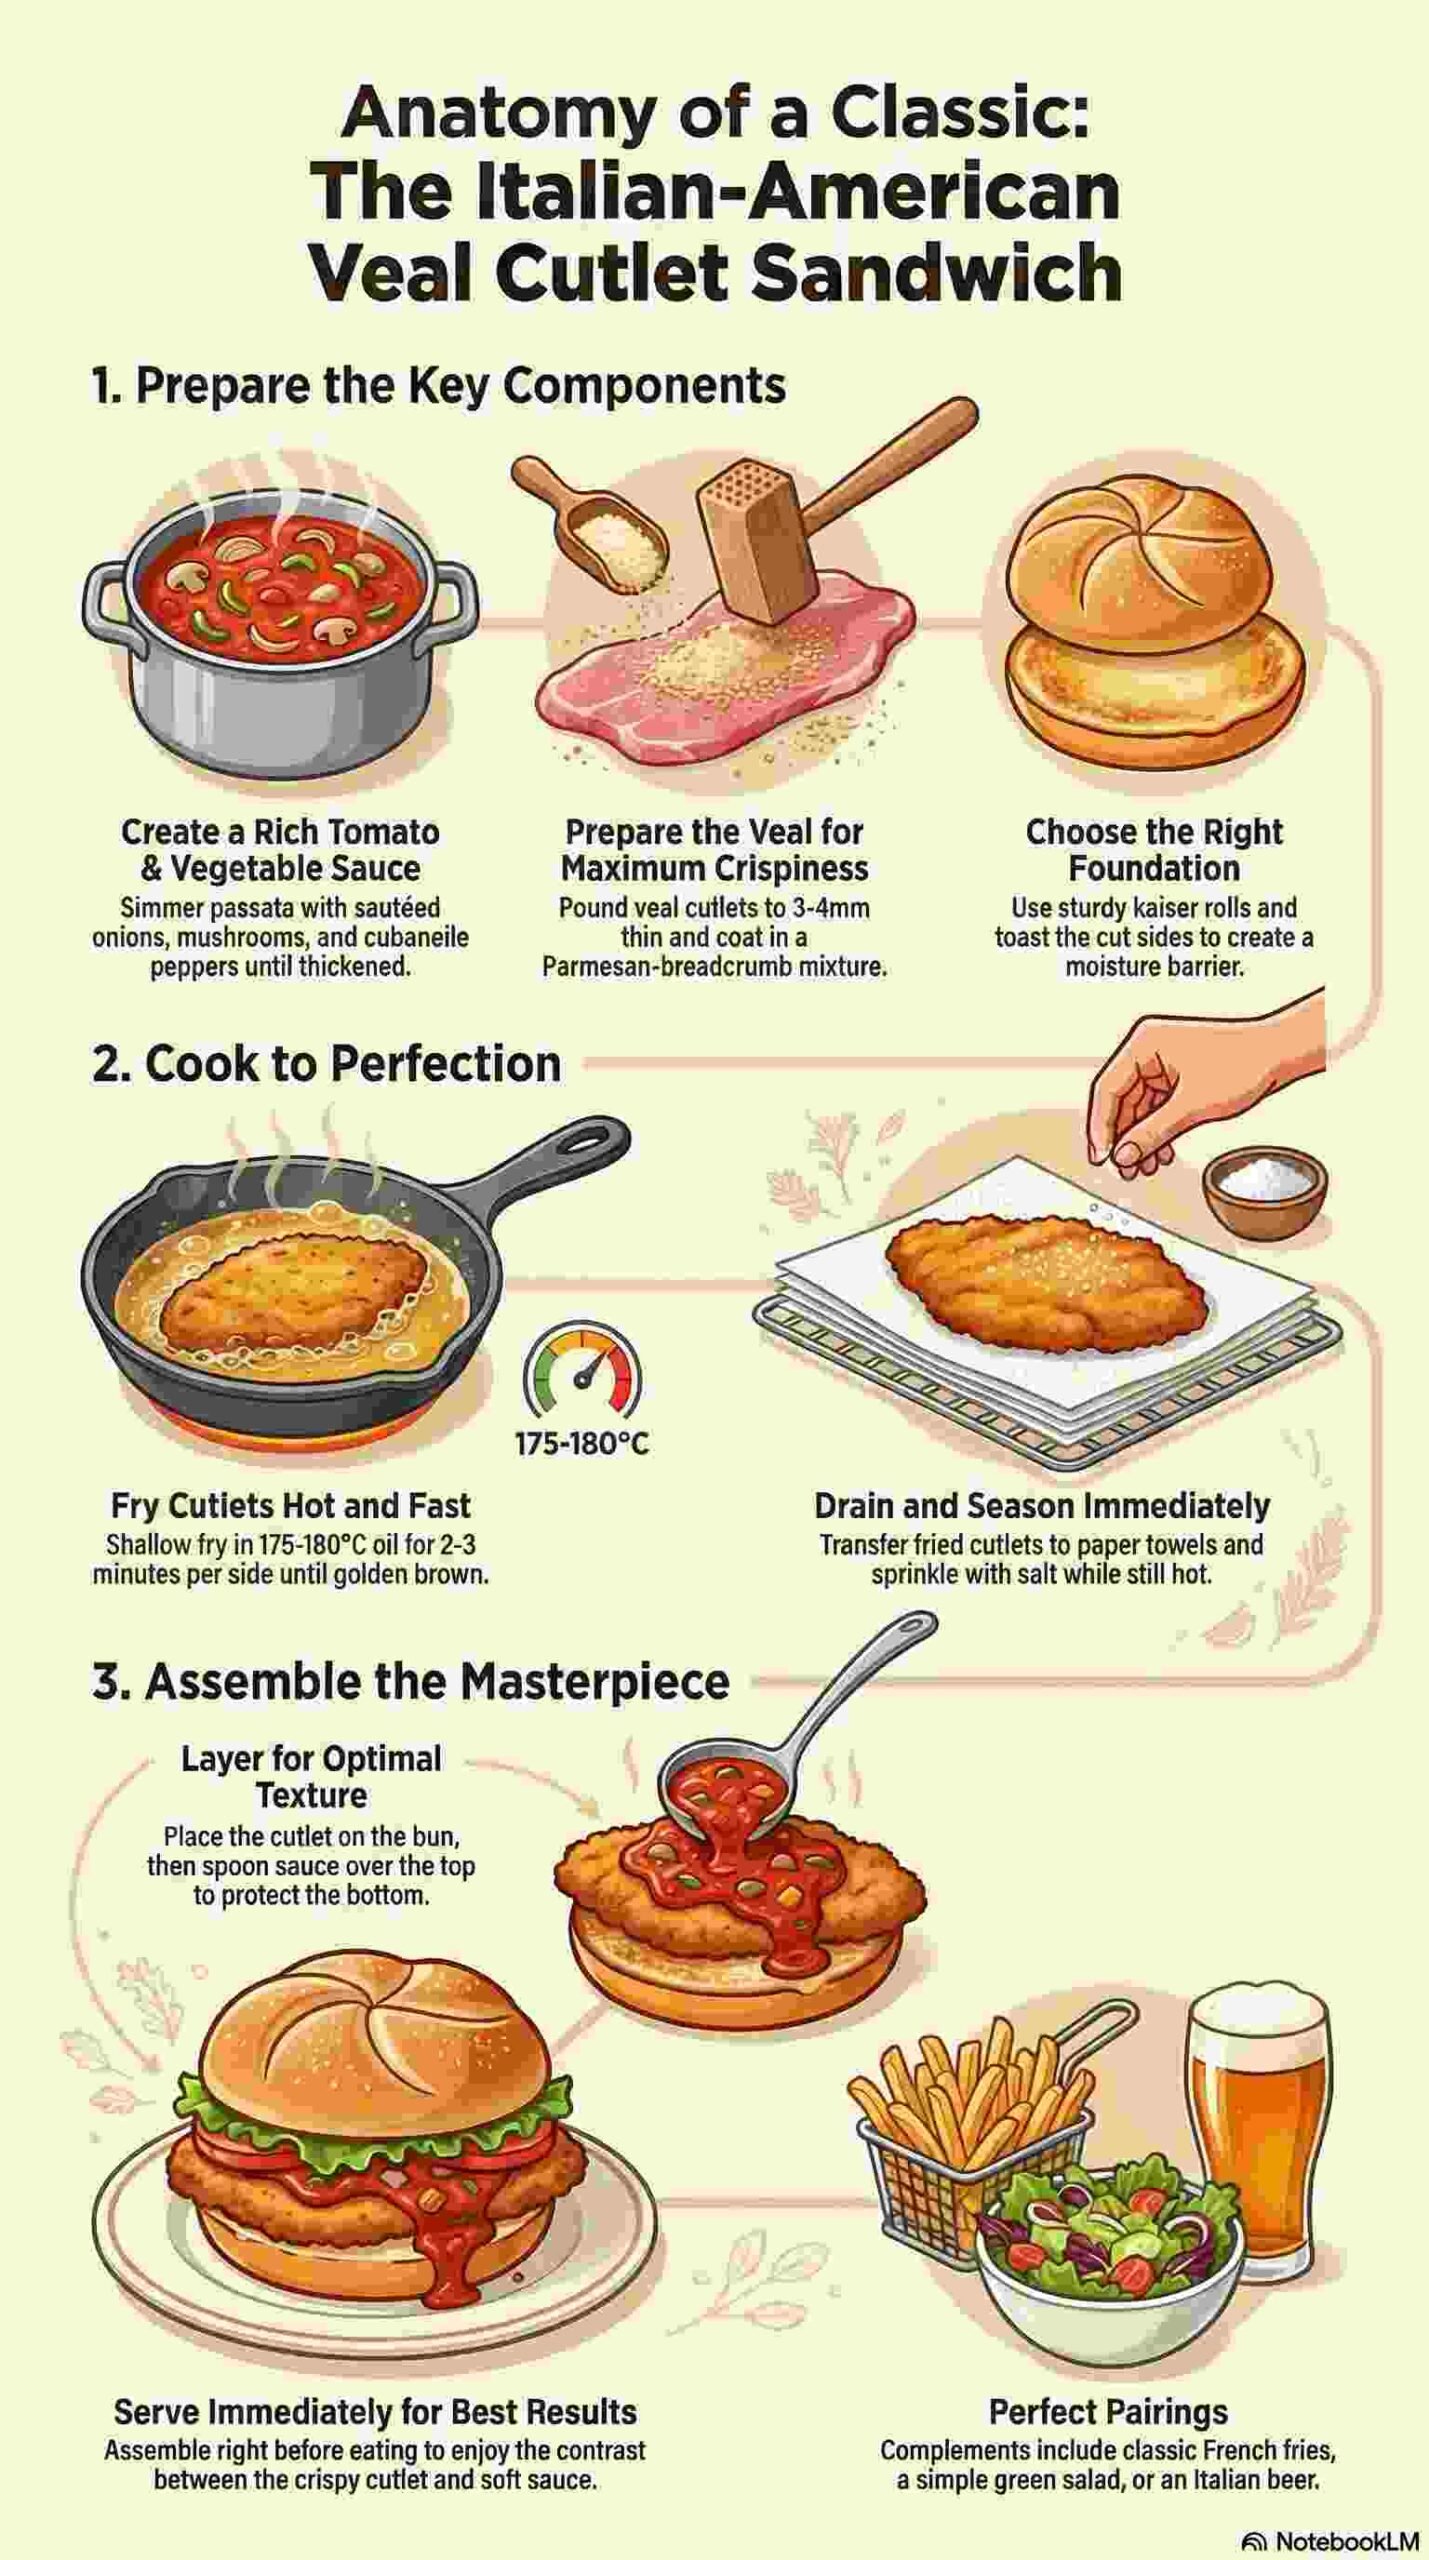
Veal cutlets for sandwiches should come from the leg (round) or loin, pounded to 3-4mm thickness. This thinness ensures quick, even cooking that produces crispy breading without drying out the delicate meat. Veal’s mild flavor and tender texture differentiate it from beef, though thinly pounded chicken breast or pork cutlets work as substitutes if veal is unavailable or cost-prohibitive.
According to the USDA Food Safety and Inspection Service, veal should be cooked to an internal temperature of minimum 63°C (145°F) followed by a 3-minute rest period. However, cutlets this thin cook through in 2-3 minutes per side, making visual cues (golden-brown crust, firm texture) more practical than thermometer readings.
When pounding veal, place cutlets between sheets of plastic wrap or parchment paper to prevent tearing. Use smooth, even strokes radiating from the center outward, avoiding aggressive pounding that creates holes or uneven thickness. Properly pounded cutlets should be uniformly thin with no thick spots that would require longer cooking.
Kaiser Roll Selection
Authentic kaiser rolls feature a distinctive starburst pattern on top and a tender interior with moderate chew. The exterior should have a thin, slightly crispy crust that yields to pressure without crumbling. Avoid overly soft hamburger buns, which lack the structure needed for saucy sandwiches, and very crusty hard rolls, which can be difficult to bite through and may cut the mouth.
The roll should measure approximately 10-12cm in diameter, providing adequate surface area for the cutlet while maintaining comfortable eating proportions. Day-old rolls often work better than fresh because they’ve dried slightly, making them less likely to become soggy when sauce is added.
Passata Versus Other Tomato Products
Passata is uncooked tomato purée that has been strained to remove seeds and skins, creating a smooth, thick consistency ideal for quick sauces. It differs from tomato sauce (which may contain seasonings and oil), tomato paste (which is highly concentrated), and crushed tomatoes (which retain more texture and chunks). Passata’s pure tomato flavor and medium body make it perfect for preparations where cooking time is limited but fresh tomato taste is desired.
Quality passata lists only tomatoes and sometimes salt as ingredients, with no added sugar, citric acid, or preservatives beyond what’s necessary for safe canning. San Marzano or other Italian-style tomatoes produce superior passata due to their lower acidity, fewer seeds, and sweeter flavor.
Breadcrumb Composition
The breading mixture’s composition affects both flavor and texture. Plain dried breadcrumbs provide a neutral base that crisps well and showcases the Parmesan and parsley additions. Italian-seasoned breadcrumbs contain herbs and garlic powder, offering convenience but less control over final seasoning intensity.
The addition of grated Parmesan directly into the breading serves multiple functions: it contributes savory, umami-rich flavor, adds salt that seasons the coating, and promotes deeper browning due to the cheese’s proteins and sugars caramelizing during frying. Fresh parsley adds color contrast and bright, fresh flavor that complements the richness of fried breading.
Method
Make the Tomato Sauce
1. Heat the oil: Add 2-3 tablespoons of olive oil to a medium saucepan or deep skillet over medium heat. The oil should shimmer but not smoke, indicating it has reached approximately 160-170°C.
2. Sauté aromatics: Add the finely diced onion and 2 bay leaves to the hot oil. Cook, stirring occasionally, for 4-5 minutes until the onion turns translucent and softens completely. The onion should not brown; if it begins taking on color, reduce heat slightly. This gentle cooking develops sweetness while eliminating the sharp, sulfurous compounds that make raw onions pungent.
Bay leaves release essential oils during heating that add subtle, complex flavor with notes of eucalyptus and subtle mint. Using whole leaves allows easy removal before serving, preventing anyone from encountering the tough, inedible leaves in their sandwich.
3. Add passata: Pour in 300ml of passata, stirring to combine with the onions and oil. The mixture should come to a gentle simmer within 1-2 minutes. Season with salt and freshly ground black pepper to taste, starting conservatively as you can adjust later. If the passata tastes particularly acidic, add a small pinch of sugar (¼ teaspoon) to balance without creating noticeable sweetness.
4. Simmer and develop flavor: Reduce heat to maintain a gentle simmer. Cook for 10-15 minutes, stirring occasionally to prevent sticking or scorching on the pan bottom. The sauce should thicken slightly as water evaporates, concentrating tomato flavor and creating better coating consistency. The sauce is ready when it coats the back of a spoon but remains pourable, not thick like paste.
5. Remove bay leaves: Fish out and discard the bay leaves before proceeding. Leaving them in creates risk of someone biting into a tough, unpleasant leaf.
Sauté Mushrooms & Cubanelli
1. Heat oil in a separate pan: While the tomato sauce simmers, add 2 tablespoons olive oil to a large skillet over medium-high heat. Using a separate pan allows the mushrooms to brown properly; combining them too early with the tomato sauce would cause steaming rather than caramelization.
2. Cook the mushrooms: Add sliced mushrooms in a single layer if possible. If your pan isn’t large enough, work in batches rather than overcrowding, which releases too much moisture and prevents browning. Let the mushrooms cook undisturbed for 2-3 minutes until the bottom surfaces turn golden brown. Toss or stir, then continue cooking until the mushrooms reduce by about half and develop rich color throughout, approximately 5-7 minutes total.
Mushrooms contain approximately 90% water, according to research from the USDA Agricultural Research Service, which means that moisture must evaporate before browning can occur. Patience during this phase produces mushrooms with concentrated, savory flavor rather than pale, rubbery texture.
3. Add peppers: Add the sliced cubanelli peppers to the browned mushrooms along with a pinch of salt. The salt draws out moisture from the peppers, helping them soften and caramelize. Cook for 3-4 minutes, stirring occasionally, until the peppers soften and develop some golden color on the edges.
4. Add herbs: Add the rosemary sprig and thyme sprigs directly to the vegetables. Gently press them with a spatula to release essential oils. Cook for 1-2 minutes until the herbs become fragrant and their aromatics infuse the vegetables. Fresh herbs added at this stage provide more pronounced flavor than dried herbs while maintaining some freshness compared to herbs cooked for extended periods.
5. Remove herb sprigs: Use tongs or a fork to fish out and discard the woody herb sprigs. They’ve released their flavor but would be unpleasant to encounter in the finished sandwich.
6. Combine with sauce: Transfer the mushroom-pepper mixture into the simmering tomato sauce, scraping all the browned bits and flavorful oil from the pan. Stir to combine thoroughly. Simmer together for 3-5 minutes, allowing the flavors to meld and the vegetables to absorb some tomato flavor while contributing their savory, slightly sweet character to the sauce. Taste and adjust seasoning with additional salt and pepper if needed. Keep warm over very low heat while preparing the veal.
Bread the Veal
1. Prepare the breading mixture: In a shallow dish or wide bowl, combine the breadcrumbs, grated Parmesan, chopped fresh parsley, and a pinch each of salt and pepper. Mix thoroughly to distribute all ingredients evenly throughout the breadcrumbs. The mixture should look uniform with parsley flecks and no clumps of cheese.
2. Season the veal: Pat the veal cutlets completely dry with paper towels. Any surface moisture prevents breading from adhering properly. Season both sides lightly with salt and freshly ground black pepper. Remember that the breading mixture already contains salt from the cheese and added salt, so season conservatively to avoid over-salting.
3. Set up breading station: Arrange two shallow dishes in assembly-line fashion. In the first dish, beat 2 eggs until completely combined. In the second dish, place your prepared breadcrumb mixture. This setup allows efficient breading of multiple cutlets.
4. Bread the cutlets: Working with one cutlet at a time, dip it into the beaten egg, turning to coat both sides completely. Allow excess egg to drip back into the dish. Immediately transfer to the breadcrumb mixture and press firmly on both sides, ensuring the breadcrumbs adhere to all surfaces with no bare spots. Gently shake off any loose breadcrumbs. Place breaded cutlets on a clean plate or wire rack.
5. Rest the breaded veal: Let the breaded cutlets rest for 5 minutes at room temperature. This resting period allows the breading to set and adhere more firmly to the meat, reducing the likelihood of breading falling off during frying. The moisture from the egg wash partially hydrates the breadcrumbs, creating better adhesion.
Fry the Cutlets
1. Heat the frying oil: Pour vegetable or olive oil into a large skillet to a depth of approximately 5-6mm (enough to come halfway up the cutlets’ sides). Heat over medium-high heat until the oil reaches 175-180°C. Test the temperature by dropping a small pinch of breadcrumbs into the oil; they should sizzle immediately and turn golden within 30-40 seconds.
2. Fry the cutlets: Carefully lay cutlets into the hot oil, working in batches if necessary to avoid overcrowding. Overcrowding lowers the oil temperature, resulting in greasy, soggy breading rather than crispy coating. Fry for 2-3 minutes on the first side without moving them, allowing the breading to set and turn deep golden brown.
3. Flip and finish: Flip the cutlets carefully using tongs or a spatula and fry the second side for 2-3 minutes until equally golden and crispy. The total cooking time of 4-6 minutes is sufficient to cook the thin veal through while creating crispy breading. The cutlets should feel firm when pressed lightly and the breading should be uniformly golden brown.
4. Drain and season: Transfer fried cutlets to a paper towel-lined plate to drain excess oil. Immediately sprinkle the hot cutlets lightly with salt. Salt added at this moment adheres to the oil on the surface and seasons the crust effectively.
Toast the Buns
1. Split and prepare: While the final batch of cutlets fries, split the kaiser rolls horizontally using a serrated knife. The goal is clean separation without compressing or tearing the bread.
2. Toast until golden: Place the split rolls cut-side down in a dry skillet over medium heat, or arrange cut-side up under the broiler, or use a toaster oven. Toast for 1-2 minutes until the interior surfaces turn light golden and slightly crispy. This toasting creates a moisture barrier that helps prevent the bread from becoming soggy when sauce is added, while contributing pleasant textural contrast and enhancing the bread’s wheaty flavor through caramelization.
Watch carefully during toasting, as the cut surfaces can go from golden to burnt very quickly, especially under a broiler.
Build the Sandwiches
1. Start with the bottom bun: Place the toasted bottom half of each kaiser roll on individual plates.
2. Add the veal cutlet: Place one hot, freshly fried veal cutlet on each bottom bun. If the cutlets are smaller than the rolls or if making a more substantial sandwich, layer two cutlets per sandwich. Position the cutlets to maximize coverage of the roll’s surface.
3. Spoon on sauce: Add a generous spoonful (approximately 3-4 tablespoons) of the hot mushroom-cubanelli tomato sauce over each cutlet. Make sure to include plenty of the vegetables, not just liquid. The sauce should coat the veal and some should pool on the bun, but avoid drowning the sandwich in excessive liquid that will make eating messy.
4. Add garnishes: Sprinkle additional grated Parmesan cheese over the sauced cutlet, adding salty, umami-rich flavor and slight textural contrast. Add a small pinch of chopped fresh parsley for color and bright, fresh flavor that cuts through the richness.
5. Top and serve: Place the toasted top bun on each sandwich. Serve immediately while the cutlet remains crispy and the sauce stays hot. If serving with fries, arrange them alongside the sandwich or in a separate basket.
Technical Notes on Assembly and Timing
The critical challenge with this sandwich lies in maintaining the cutlet’s crispiness despite sauce contact. Several factors help achieve this balance:
Timing: Assembling and serving immediately after frying preserves maximum crispiness. The longer the fried cutlet sits, especially under hot sauce, the more the breading softens as it absorbs moisture.
Sauce consistency: The sauce should coat the veal without being watery. Proper reduction during simmering creates sauce with enough body to cling rather than running off, minimizing bread contact with liquid.
Strategic placement: Spooning sauce over the cutlet’s top rather than underneath keeps the bottom breading drier and maintains more crispiness. The top breading softens from sauce contact, creating textural contrast between the soft, saucy top and the crispier bottom.
Toasted buns: The toasted interior surfaces create a mild moisture barrier through dehydration and crust formation, slowing sauce absorption compared to soft, untoasted bread.
Even with these techniques, this is fundamentally a “eat immediately” sandwich rather than one that holds well. The breading will progressively soften as the sandwich sits, which some people actually prefer, finding the combination of crispy and tender breading more interesting than uniform crispiness.
Serving Suggestions and Accompaniments
Traditional accompaniments for Italian-American veal sandwiches include:
French fries (frites): Classic pairing that adds textural contrast and additional richness. Thin-cut, crispy fries work best, providing contrast to the sandwich’s substantial nature.
Simple green salad: A salad with sharp vinaigrette cuts through the fried richness and provides refreshing contrast. Arugula, radicchio, or mixed greens with lemon-olive oil dressing work particularly well.
Marinated vegetables: Italian-style giardiniera (pickled vegetable mix), marinated roasted peppers, or pickled hot peppers provide acidic, bright contrast that refreshes the palate between bites.
Additional sauce for dipping: Serve extra mushroom-cubanelli tomato sauce on the side for dipping fries or adding more to the sandwich as desired.
Beverage pairings: This rich sandwich pairs well with Italian red wines like Chianti or Barbera, cold Italian beer like Peroni or Moretti, or sparkling water with lemon to cleanse the palate.
Variations and Substitutions
Protein alternatives: Replace veal with thin-pounded chicken breast, pork cutlets (pounded thin), or even firm white fish like cod or haddock. Cooking times remain similar due to the thin profile.
Pepper substitutions: If cubanelli peppers are unavailable, substitute with Italian long hots for more heat, shishito peppers for mild sweetness, or thinly sliced bell peppers (though bell peppers have thicker walls and stronger flavor).
Bread options: Substitute kaiser rolls with ciabatta rolls, Italian hero rolls, or even focaccia for different textural experiences. The bread should be sturdy enough to handle sauce without disintegrating.
Cheese additions: Some variations include melted provolone or mozzarella placed on the cutlet before adding sauce, creating a more “veal Parmesan” style sandwich. To incorporate cheese, place a slice on each cutlet immediately after frying, allowing residual heat to melt it before assembly.
Sauce modifications: Add red pepper flakes for heat, fresh basil torn into the sauce, capers for briny complexity, or a splash of red wine during the initial sauce simmering for depth.
Gluten-free version: Use gluten-free breadcrumbs for coating and gluten-free rolls for assembly to accommodate gluten sensitivities or celiac disease.
Make-Ahead and Storage
This sandwich is fundamentally about freshness and immediate consumption, but components can be prepared ahead:
Sauce preparation: The tomato sauce with mushrooms and peppers can be made up to 3 days ahead and refrigerated. Reheat gently before serving, adding a splash of water if it has thickened too much during storage.
Breading station: The breadcrumb mixture can be prepared up to 1 week ahead and stored in an airtight container at room temperature.
Breaded cutlets: Bread the cutlets up to 4 hours ahead and refrigerate, uncovered, which actually helps the breading set more firmly. Fry directly from refrigeration, adding 30-60 seconds to the cooking time.
Leftover assembled sandwiches don’t store well, as the breading becomes completely soggy. However, leftover fried cutlets can be refrigerated for 2-3 days and reheated in a 180°C (350°F) oven for 8-10 minutes, though they won’t regain full original crispiness. Leftover sauce stores well refrigerated for up to 5 days.
This veal cutlet sandwich represents Italian-American cuisine at its finest: taking traditional ingredients and techniques (breaded cutlet, tomato sauce, fresh herbs) and adapting them into a format that’s simultaneously casual and craveable. The combination of crispy breading, tender veal, rich tomato sauce studded with vegetables, and sturdy bread creates a complete, satisfying meal that showcases why this style of sandwich remains popular in Italian-American communities and beyond.