
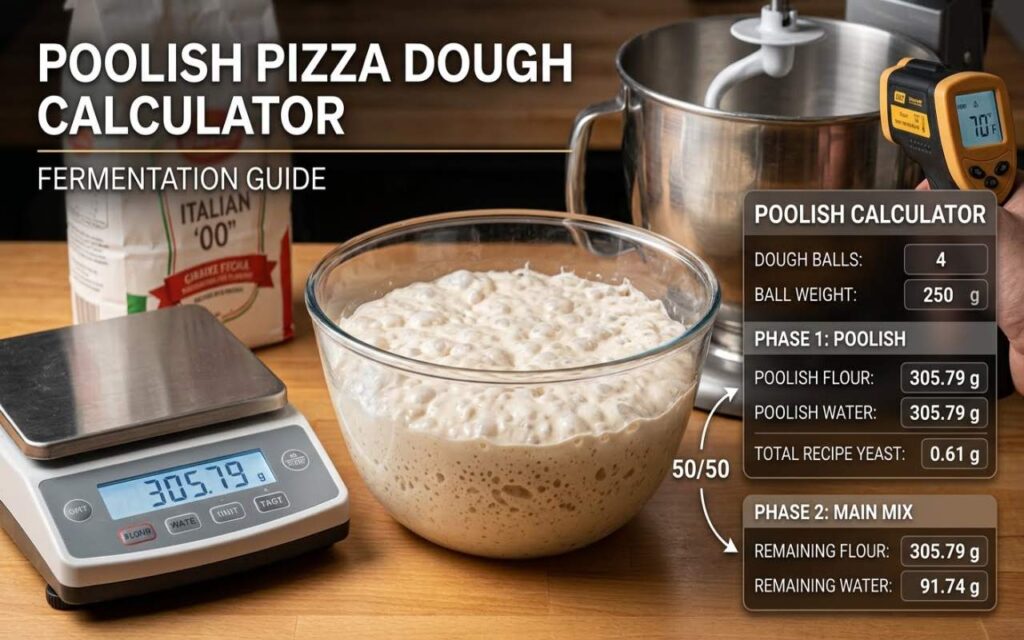
Mastering the art of an airy, open crumb structure and an intensely aromatic crust requires moving beyond direct, same-day dough methods. If you want to replicate the soft, pillowy cornicione (crust) found in elite pizzerias, you need to introduce an indirect fermentation method known as a Poolish.
A Poolish is a highly hydrated, liquid pre-ferment starter made from equal parts flour and water, plus a tiny fraction of commercial yeast. By allowing this mixture to ferment overnight, you unlock biological and structural transformations that are impossible to achieve in a standard short-mix timeline.
Using a dedicated poolish pizza dough calculator takes the confusing multi-stage math out of your prep work. Below, we break down exactly how this pre-ferment works, how it completely re-engineers your dough, and how to mix your final batch flawlessly.
🧪 Poolish Proportional Calculator
Interactive Formula Matrix
Phase 1: The Poolish Starter (16 Hours Prior)
Phase 2: Final Main Mix Additions
This interactive module includes a built-in 2.5% processing waste buffer and is hardcoded to a baseline 65% total hydration profile.
How to Calculate Poolish Starter Ratios
The fundamental law of a standard poolish starter is that it always maintains a 100% hydration profile. This means that no matter how small or large your batch is, you must mix equal weights of flour and water.
When computing an overnight poolish pizza recipe, you do not simply mix a random amount of starter and toss it in. You must calculate your starter as a fixed proportion of the final recipe’s master weights. Professional baking targets 30% to 50% of the total formula flour to build the overnight starter.
For example, if your grand total recipe requires 600 grams of flour, a 50% poolish allocation dictates that you pull 300 grams of that flour and mix it with 300 grams of water from your master poolish pizza dough calculator recipe sheet. The remaining 300 grams of flour and leftover water are completely withheld until the secondary main dough mixing phase the following day.
If you are looking to fully customize these baseline settings—such as manually adjusting your hydration up to 75%, altering your salinity targets, or shifting your timeline to a multi-day cold-ferment layout—you can use our fully adjustable, unrestricted master pizza dough calculator.
The Biological Science Behind Sourdough-Style Flavors
Why go through the hassle of managing a two-stage indirect fermentation system when you can just mix all your ingredients at once? The answer lies in structural biochemistry and lactic acid development.
When commercial yeast is placed into a highly fluid, liquid environment (100% hydration) without salt to restrict its metabolic activity, it multiplies rapidly. Over a 16-hour ambient rest window, the enzymes amylase and protease break down the complex starches inside the grain into basic maltose and glucose sugars.
As the yeast cells consume these simple sugars, they produce natural organic acids (lactic and acetic acids) alongside carbon dioxide gas. Because this process happens slowly at room temperature, it infuses the commercial dough structure with the deep, complex, sour flavor notes typically reserved for wild sourdough starters.
Simultaneously, the enzymatic breakdown relaxes the gluten matrix, yielding a dough that is incredibly extensible and easy to shape without snapping back.
Step-by-Step Production Protocol
Step 1: Initiating the Preferment
Sixteen hours before you intend to mix your final main batch, measure out your phase 1 values using a high-precision scale. Whisk your calculated poolish water and your total recipe yeast together in a sealable glass container until the yeast dissolves completely. Dump your phase 1 poolish flour into the liquid and stir with a small spatula until a smooth, shaggy pancake-like paste forms with no dry flour pockets remaining. Seal the container loosely and allow it to sit at room temperature (68°F to 72°F / 20°C to 22°C).
⚠️ Temperature Fermentation Note: Commercial yeast is highly sensitive to ambient room temperatures. While 14 to 16 hours at a steady 68°F (20°C) is ideal, if your kitchen exceeds 72°F (22°C) in the summer months, your poolish will over-ferment, exhaust its food supply, and collapse into an acidic liquid. If your room is warm, move the starter container to a cooler spot (such as a basement) or reduce the initial yeast input to keep the metabolic rate balanced.
💡 The Maturity Check: Your poolish is officially fully mature and ready for production when it has more than doubled in volume, its surface is covered in a dense network of tiny, popping micro-bubbles, and the center is beginning to slightly dome or recede down the sides of the glass container.
Step 2: Executing the Final Main Mix
When your starter has hit peak biochemical maturity, pour the remaining phase 2 main mix water directly into your poolish container to loosen the sticky fermentation chains from the glass walls. Pour the fluid mixture directly into your stand-mixer bowl.
Add your remaining phase 2 flour to the bowl and mix on low speed for 2 to 3 minutes until a basic dough mass forms. Allow the rough dough mass to rest inside the bowl for 10 minutes—this brief pause allows the starch molecules to absorb moisture completely before you build your structural network.
Turn your mixer back to low speed, sprinkle your calculated sea salt across the surface, and knead for an additional 5 minutes until a completely smooth, elastic, and glossy skin wraps across the outer surface of your dough ball.
Optimizing the Bake for High-Hydration Crusts
A masterfully calculated poolish dough yields an interior structure packed with delicate, expanded air pockets. However, if your oven setup cannot deliver instant, high-energy conductive heat, those air pockets will collapse before they can expand into an open crumb.
If you are cooking your pizzas inside a standard residential kitchen oven, ensure you preheat a heavy baking steel at your oven’s maximum temperature setting for at least one full hour prior to stretching your dough. The intense energy stored inside a thick piece of steel mimics a masonry deck, conducting heat directly into the wet crust to trigger a massive, rapid oven spring.
🔥 Ready to take your backyard cooking to the absolute limit? If you truly want to unlock the potential of high-hydration poolish formulas, standard kitchen heat limits can hold you back. Check out my extensive, hands-on review of the Best Pizza Ovens for Home Use to discover how leading portable outdoor ovens manage precision floor temperatures to char artisan crusts flawlessly.