
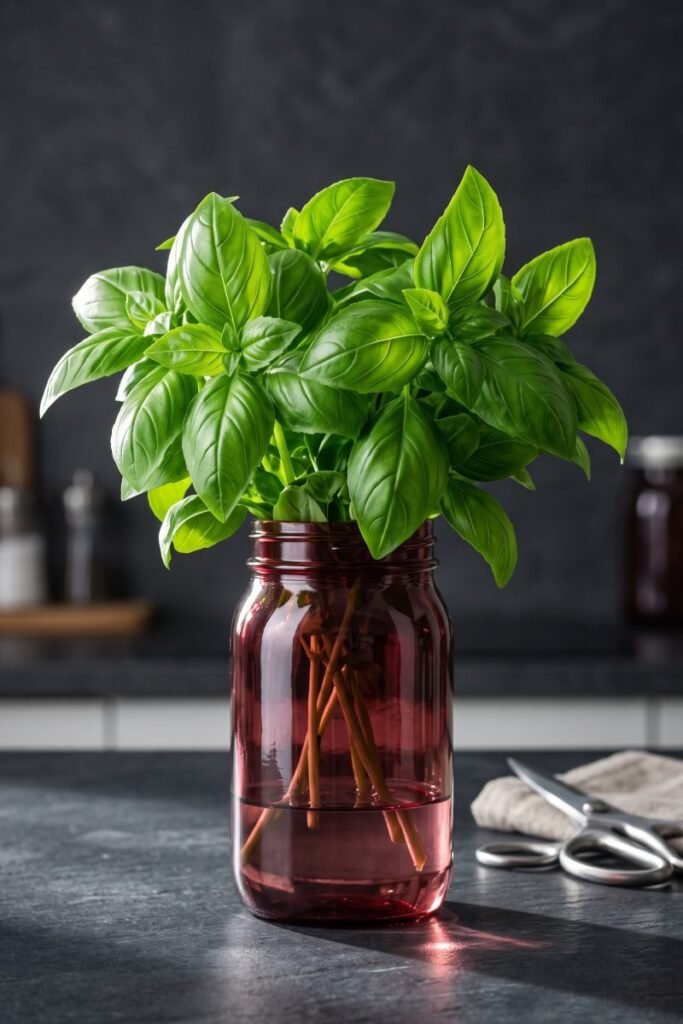
When I pinch a cluster of vibrant green leaves off a bundle to finish a fresh pan reduction, learning how to properly store fresh basil is the absolute ultimate rule required to prevent your aromatic herbs from turning into a black, slimy mess in under forty-eight hours. Over my years of managing fragile kitchen greens and raw volatile oils, I have treated the delicate surface cellular walls of soft-leaved annual herbs as a serious temperature and hydration equation rather than a matter of luck.
Whenever I see amateur home cooks toss an unprotected bundle of fresh herbs directly into a cold plastic produce drawer and wonder why the edges turn completely charred and bruised overnight, I notice how poor climate handling ruins the crop. For me, delivering a true garden-fresh aroma requires keeping your leaves far away from low-temperature zones, managing absolute surface dryness, and storing the stems in an open liquid environment that mimics a fresh floral arrangement.
Why Cold Temperatures Trigger Rapid Cellular Oxidation
To understand why a standard household refrigerator destroys a fresh bunch of sweet green leaves so aggressively, you have to look closely at the plant’s biological tropical origins. Basil is a warm weather plant that is highly sensitive to cold climates, engineered to thrive in moderate ambient temperatures that remain consistently above the fifty degree threshold.
When you slide unprotected leaves onto a cold refrigerator shelf running near thirty eight degrees, the intense thermal drop freezes the loose water locked inside the plant’s microscopic cells. This freezing action causes the internal fluids to expand rapidly, which physically shatters the fragile cellulose cell walls throughout the leaf structure.
The exact second you pull the bundle back out into room air, those ruptured cell lines collapse completely, exposing the internal polyphenol compounds directly to environmental oxygen currents. This sudden exposure triggers a rapid enzymatic browning reaction that turns the bright green tissue into a dark, limp, and completely flavorless husk that ruins your presentation.
I manage these exact environmental cell failures constantly when treating sensitive raw ingredients on my workspace, a structural preservation rule I track closely inside my guide on How to Correctly Store Fresh Mozzarella So It Doesn’t Get Slimy.
The Bouquet Method for Countertop Moisture Balance
My absolute baseline technical rule for extending the lifespan of your fresh herb bunches relies on building a custom countertop hydration base that respects the plant’s unique respiratory needs. I follow the strict hydration parameters, temperature thresholds, and air circulation guidelines documented inside the official Serious Eats Fresh Herb Storage Manual to keep my green bundles pristine.
When you bring a fresh bouquet home from the market, cut off the rubber bands or plastic ties immediately to prevent bruising along the main vascular tracks. Use a sharp pair of kitchen shears to snip a quarter inch off the bottom of the stems at a sharp angle, a cut that reopens the internal tubes so they can drink water freely.
Drop the bunch upright into a clean glass jar filled with an inch of filtered, room temperature water, ensuring that no low hanging leaves are touching or submerged inside the liquid line. Leave the jar resting openly on a dark corner of your kitchen counter space situated far away from harsh direct sunlight windows or hot stovetop drafts.
This simple countertop setup lets the stems draw up fresh hydration continuously while keeping the leaves in an optimal sixty eight degree room climate, preserving your essential aroma oils for up to two full weeks.
The Plastic Tent Hack for Arid Kitchen Spaces
The final variable that can threaten your countertop herb arrangement happens when your indoor kitchen environment suffers from extremely dry winter heating air or active air conditioning drafts. Because soft annual leaves possess high surface porosity, dry air currents can draw moisture out of the plant cells faster than the stems can pump water up from the jar base.
To halt this environmental dehydration, loosely drape an inverted, clean plastic grocery bag over the top of the green bouquet to build a protective humidity dome. The plastic canopy traps escaping moisture vapors from the jar, creating a localized tropical microclimate that stops the leaves from wilting or curling along their edges.
Make sure the plastic bag fits loosely around the rim of the jar so that fresh room air can still circulate underneath the border freely. If you seal the bag tightly with a rubber band, you will lock out fresh air entirely, creating a stagnant microclimate that causes condensation to pool across the leaves and rot the crop.
The plastic canopy provides a physical buffer zone against fast evaporation currents, ensuring your early morning harvest maintains its structural fluid balance perfectly without losing color before you slice it.
Simple Kitchen Rules to Wash and Spin Before Serving
The final law for managing your green inventory requires postponing your water washing steps until the absolute second you are ready to slice the leaves into your dinner. Never run your entire raw herb bunch under cold tap water before placing the stems into the storage jar, as trapped surface droplets will trigger rapid bacterial decay.
When you are ready to cook, pinch off the exact number of leaves your recipe demands, drop them into a cold water bath for thirty seconds to loosen soil grains, and transfer them into a salad spinner. Spin the basket vigorously until every single drop of surface moisture is driven off, leaving the leaves completely matte and dry to the touch before your knife cuts the tissue.
I know my asset management is completely successful when the cut ribbons tumble away from my chef’s knife in bright, fluffy flakes that show zero dark bruising along the cut lines. For me, taking the extra two minutes to build a proper countertop bouquet and manage your washing timelines is the ultimate kitchen secret to delivering an elite meal to your family table.