
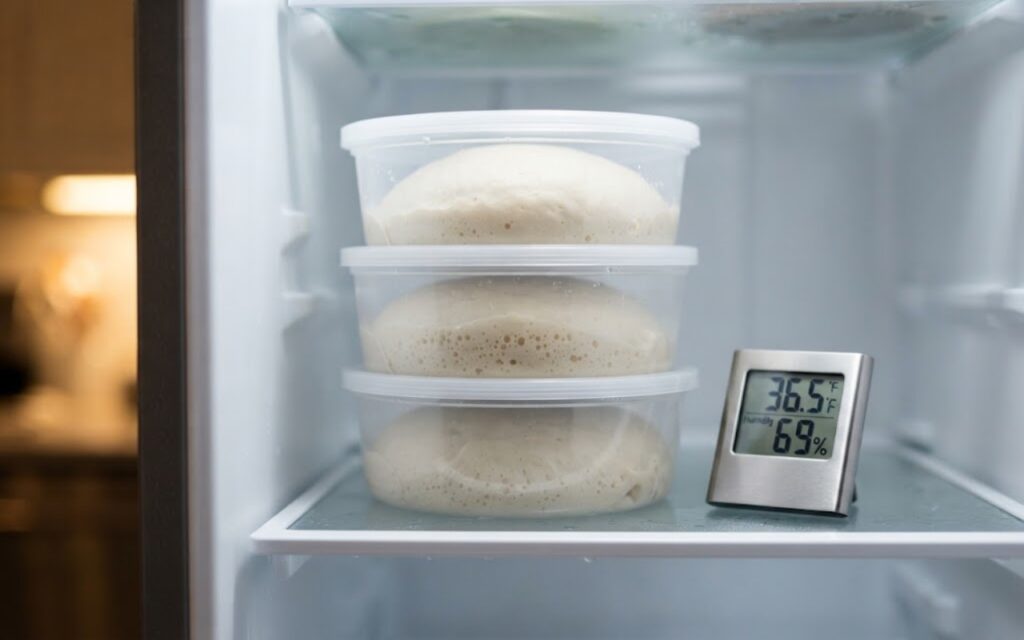
Slowing down your dough’s rising cycle inside a controlled environment is the ultimate secret to unlocking restaurant-quality crust structure and complex flavor development. If you rely strictly on rapid, same-day room temperature proofs, your crusts will cook up tasting flat, yeast-forward, and simple. To take full control of your baking schedule, mastering your pizza dough cold fermentation time variables is an absolute necessity.
Cold fermentation is not just a storage convenience; it is a technical biochemical process where cold temperatures retard yeast activity. This significantly slows down carbon dioxide production while allowing flavor-building organic assets to accumulate over multiple days.
Using this interactive timeline management widget eliminates the confusion of scheduling your dough prep weeks in advance. Below, we break down the molecular differences between counter proofs and long-term fridge cures, and how to calibrate your baking timeline seamlessly.
❄️ Cold Fermentation Matrix
Interactive Timeline Optimization Engine
Yeast Scaling Requirements
Yeast allocation scales downward automatically for long durations to prevent cell starvation and dough deflation over extended schedules.
The Molecular Science of Low-Temperature Retarding
When a fresh pizza dough mass is tucked away inside a warm room, the living yeast cells eat single-mindedly, digesting simple sugars rapidly and pumping out carbon dioxide gas. This structural gas stretches the gluten framework quickly, forcing a fast volume doubling within 2 hours. However, this high metabolic speed leaves zero window for complex flavor asset accumulation.
Dropping that same container into a refrigerator between 36°F and 40°F (2°C to 4°C) does not freeze the yeast into complete dormancy. Instead, it merely retards its metabolic velocity. The yeast cells continue working at a fraction of their normal speed, which is why your dough will still show visible gas expansion during its first few hours in the cold zone.
While gas production drops to a crawl, the natural enzymes amylase and protease continue working undisturbed inside the cold boundaries. Amylase chips away at complex grain starches, transforming them into sweet maltose and glucose sugars.
Because standard commercial Instant Dry Yeast (IDY) dough lacks relevant populations of true Lactic Acid Bacteria (LAB), it does not undergo classic bacterial sourdough fermentation. Instead, the incredible aroma and retro-bakery flavor profiles developed during long fridge cures are created entirely by the byproducts of secondary yeast metabolism.
If you are looking to calculate exact weights for your flour, salt, and water components alongside these custom yeast percentages, utilize our comprehensive master pizza dough calculator.
Calibrating Your Cold Fermentation Timeline
Choosing your target duration tier directly dictates your required yeast density scaling. If you fail to turn down your yeast ratios for long rests, the over-active cells will exhaust their food supply entirely, causing the dough to lose structural integrity and collapse into a dense, flat puddle:
- The 24-Hour Window: This is the baseline setting for reliable mid-week artisan results. Gluten networks reach high elasticity, making the final dough balls exceptionally resilient and simple to stretch without tearing. The flavor is bright and clean.
- The 48-to-72-Hour Window: This is the absolute golden sweet spot for gourmet crust performance. The long enzyme timeline allows sugars to build up aggressively inside the crumb. During baking, these excess sugars caramelize instantly, resulting in a deep, mottled brown crust pattern known as “leopard spotting.” The dough handle stretches effortlessly with immense extensibility.
- The 96-Hour Limit: This is the extreme edge of starch maturation. Beyond 4 days, protease enzymes begin degrading structural gluten chains entirely. The dough matrix loses its rubber-like elasticity, becoming highly loose, fragile, and easy to tear during shaping steps.
Crucial Safety Rule: To pull off a 96-hour cure successfully without total dough deflation, you must enforce a razor-thin yeast cap of 0.05% IDY and keep your appliance strictly dialed into a tight 36°F to 38°F (2°C to 3°C) cold envelope. Attempting a 96-hour rest in a mild 40°F+ environment will result in structural breakdown and complete recipe failure.
Step-by-Step Cold Maturation Protocol
1. The Room Temp Head-Start
Never toss a freshly kneaded dough ball straight into the refrigerator. Cold air takes hours to penetrate to the core of a dense dough mass, leading to uneven fermentation rates. Instead, allow your covered mixing bowl to rest on your counter for 20 to 30 minutes first. This brief room-temperature window activates the yeast cells cleanly before the cold chill slows them down.
2. Individual Ball Portioning
While bulk cold fermenting (chilling the entire batch together) works well, you will achieve far higher structural consistency by dividing your dough into individual weights before refrigerating. Cut and ball your portions down to the exact gram, place them into individual lightly oiled round plastic containers, and seal them with airtight lids.
3. The Room Temp Awakening Window
Two hours before you stretch your pizza, remove your containers from the refrigerator and place them on your counter. Cold gluten chains are incredibly rigid, tight, and prone to snapping back if handled immediately. Allowing the dough containers to sit undisturbed allows the core temperature to warm back up to a soft, relaxed 68°F (20°C), making it simple to stretch your dough by hand into a uniform, paper-thin sheet.
Thermal Heat and Your Final Crust Expansion
Once your cold-matured dough has successfully accumulated its rich reserve of structural sugars and natural starches, executing that recipe perfectly depends on the conductive energy of your cooking deck. Lower temperature home ovens cannot vaporize internal moisture fast enough, which can lead to a dry, dense rim on a long-fermented dough.
To achieve maximum volume expansion and instant blistering on your crust, you must pair your fermentation schedules with an intense, uniform heat source.
🔥 Ready to maximize your dough’s oven spring? Even a perfectly executed cold ferment recipe requires an intense blast of radiant heat to expand those fragile carbon dioxide pockets before the dough structure sets. Check out my comprehensive, real-world testing review of the Best Pizza Ovens for Home Use to see how modern portable outdoor and countertop electric models manage precision floor deck temperatures to char artisan bakes flawlessly.