
When I clear off my wooden pastry bench after a long bulk fermentation cycle, wondering can you freeze pizza dough after it rises without destroying the internal yeast cells is a common structural question for home bakers.
Over my years of managing high-hydration wheat frameworks and balancing gas retention windows, I have treated low-temperature enzyme storage as a basic material preservation problem with highly predictable kitchen rules.
Whenever I see amateur home cooks dump an over-expanded, un-balled mass of bubbly dough straight into a cold chest freezer without a protective lipid shield, it breaks my heart. Watching the exposed outer crust develop severe freezer burn while the internal water molecules expand into sharp ice crystals shows how poor cold management ruins the flour matrix.
For me, delivering a true restaurant-quality bake from a frozen batch simply requires letting the initial fermentation finish, balling the portions into tight spheres, and executing a controlled, multi-stage defrosting method that wakes the yeast up smoothly.
Why Yeast Cells Survive the Hibernation Drop
To understand why a fermented yeast dough can safely handle sub-zero environments without losing its rising power, you have to look closely at microscopic cellular preservation mechanics. Commercial baker’s yeast, Saccharomyces cerevisiae, is a highly resilient living organism that does not automatically die when exposed to freezing temperatures; instead, the extreme cold simply drops the cells into a metabolic hibernation state.
The primary danger during this thermal drop is not the cold itself, but the formation of sharp, jagged ice crystals inside the wet dough if the freezing process moves too slowly. These expanding ice shards can physically slice through your carefully developed glutenin and gliadin protein strands, permanently weakening the structural framework of your dough ball.
To bypass this internal cellular degradation, always shape your fully risen dough into tight, dense spheres before freezing, a mechanical tightening step that drives out excess air pockets and forces the moisture to freeze into a uniform pattern.
This structural protection ensures the gluten net remains completely intact, a texture-saving focus I maintain when managing loose starch systems inside my comprehensive guide on Focaccia vs. Ciabatta: What is the Difference in Dough Setup?.
Without these structural cell boundaries working effectively to isolate the moisture lines, the expanding ice crystals can tear through your carefully stretched protein blankets. This hidden damage causes the thawed dough rounds to lose their elastic snap, transforming your artisan base into an unappealing, sticky puddle that fails to blister inside the hot oven.
The Airtight Double-Shield Packing Protocol
My absolute baseline technical rule for prepping your expanded dough rounds for long-term cold storage relies on building a continuous moisture and air block. I follow the strict hydration boundaries, oil coating scales, and low-temperature sealing parameters documented inside the official The Kitchn Pizza Dough Preservation Guide to keep my foundations pristine.
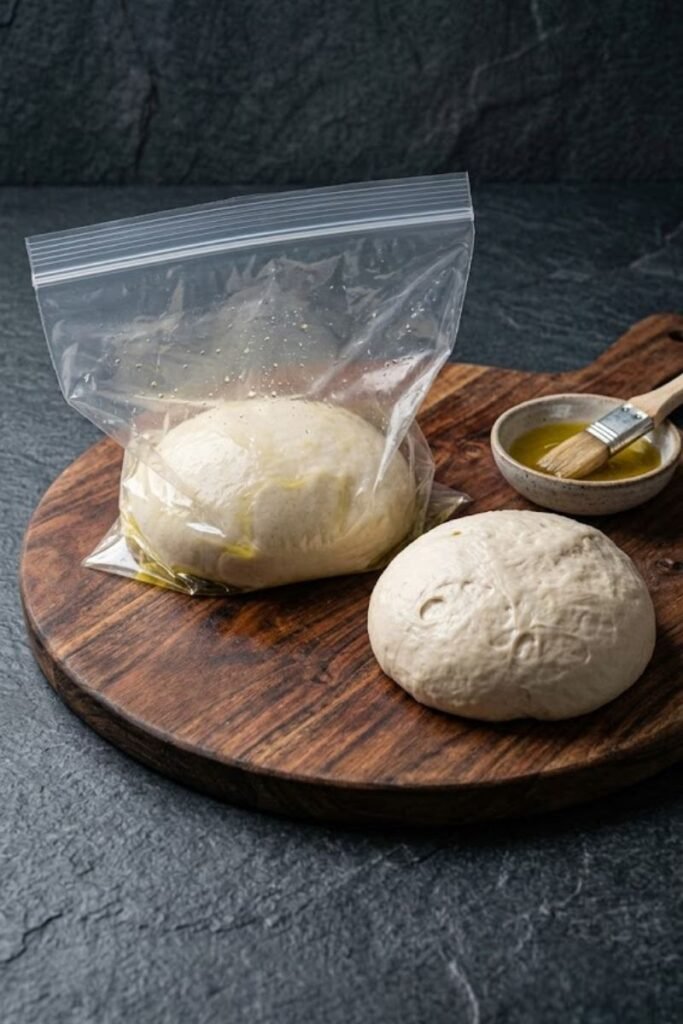
Once your bulk fermentation rise is complete, deflate the mass gently and portion it into individual, single-pizza balls weighing roughly 250 grams each. Pour a tablespoon of extra virgin olive oil over each sphere, rolling the wheat across your board until it is completely wrapped in a slick lipid blanket.
This oil layer serves as a sacrificial skin that prevents the cold, dry freezer air from sapping moisture out of the outer dough crust. Slide each oiled ball into an independent, heavy-duty freezer zip-top bag, press the plastic down firmly to drive out every trace of surrounding air, and zip the track completely shut.
This total atmospheric block prevents the dry freezer currents from scorching the delicate flour starches, a dehydration defense that preserves the clean sugars inside the core until you are ready to assemble your toppings.
The Controlled 12-Hour Refrigerator Defrosting Method
The final law for successfully bringing your frozen dough assets back to life requires completely banning any fast, high-heat countertop tricks. Never drop a solid, frozen block of dough into a bowl of hot water or microwave it on a defrost setting, as intense direct heat will instantly kill the sensitive yeast cells on the outer ring while leaving the center frozen solid.
Instead, remove the sealed bag from your freezer vault exactly twelve hours before you plan to assemble your dinner, and place it flat on a middle shelf inside your refrigerator. This cold thawing environment allows the ice crystals to melt back into the protein matrix at a slow, measured pace, re-hydrating the gluten sheets without shocking the yeast cells.
About two to three hours before baking, pull the softened dough ball out of the fridge, drop it into a lightly greased proofing container, and let it rest undisturbed on your kitchen counter. As the core temperature climbs back up to seventy degrees, the dormant yeast cells wake up fully and begin consuming the remaining flour sugars.
I know my defrosting method is completely successful when the room-temperature ball looks supple, feels highly stretchable, and displays tiny active gas bubbles right under its smooth outer skin. Taking the extra time to float an oil shield and manage your thawing temperatures is the ultimate secret to keeping your artisan baking elite.
This meticulous thermal control guarantees your yeast cultures survive the sub-zero drop completely intact, ensuring your finished crust achieves a light, crispy framework that bubbles beautifully against the pizza stone.