
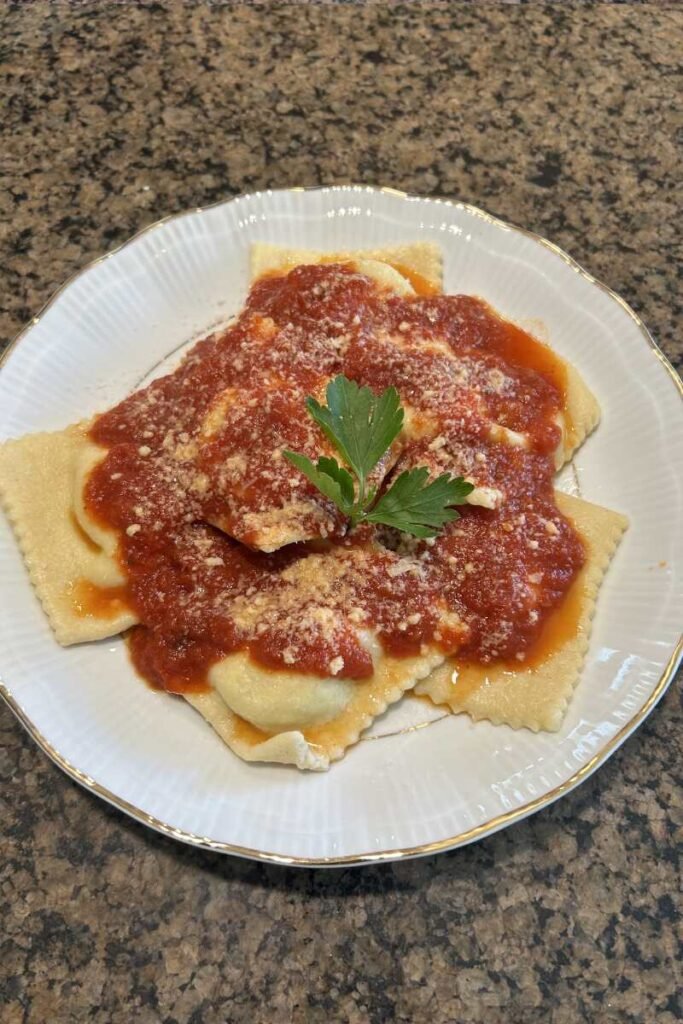
This classic homemade ricotta ravioli recipe demonstrates fundamental pasta-making techniques that form the foundation of Italian cuisine. The combination of creamy ricotta, sharp Parmesan, and fresh herbs creates filling with balanced flavor and light texture, while the handmade egg dough provides the delicate wrapper that defines quality fresh pasta. Mastering this preparation opens the door to countless ravioli variations using the same basic method.
Understanding Ravioli Construction
Successful ravioli requires attention to three critical elements: filling consistency, dough texture, and sealing technique. The filling must be firm enough to hold its shape without oozing but creamy enough to provide pleasant mouthfeel.
The dough needs sufficient strength to contain the filling during cooking without tearing, yet remain tender enough to complement rather than overwhelm the delicate filling. Proper sealing prevents the ravioli from opening during boiling, which would release filling into the cooking water.
The technique of creating filled pasta dates back centuries in Italian culinary tradition, with regional variations found throughout Italy. Ricotta-filled ravioli represents one of the most fundamental preparations, allowing the pasta maker to focus on technique without complex filling preparations.
Ingredients
For the Filling
- 300g fresh ricotta cheese
- Parmesan cheese, finely grated (approximately 50-75g, to taste)
- 1 handful fresh parsley, finely chopped (approximately 3 tablespoons)
- Nutmeg, freshly grated (approximately ¼ teaspoon, to taste)
- Salt and freshly ground black pepper to taste
- 1½ teaspoons sugar
For the Dough
- 600g 00 flour
- 6 large eggs
- 1 tablespoon extra virgin olive oil
- Pinch of salt
- Water (only if needed for adjustment)
For Cooking and Serving
- Salt for pasta water
- Butter and sage for simple sauce (optional)
- Additional Parmesan for serving
Ingredient Selection and Quality
Ricotta Quality Considerations
Fresh ricotta from Italian markets or specialty cheese shops provides superior texture and flavor compared to mass-produced supermarket versions. Quality ricotta should taste mildly sweet and creamy with fine, smooth curds rather than grainy texture. Whole-milk ricotta offers richer flavor and better mouthfeel than part-skim varieties.
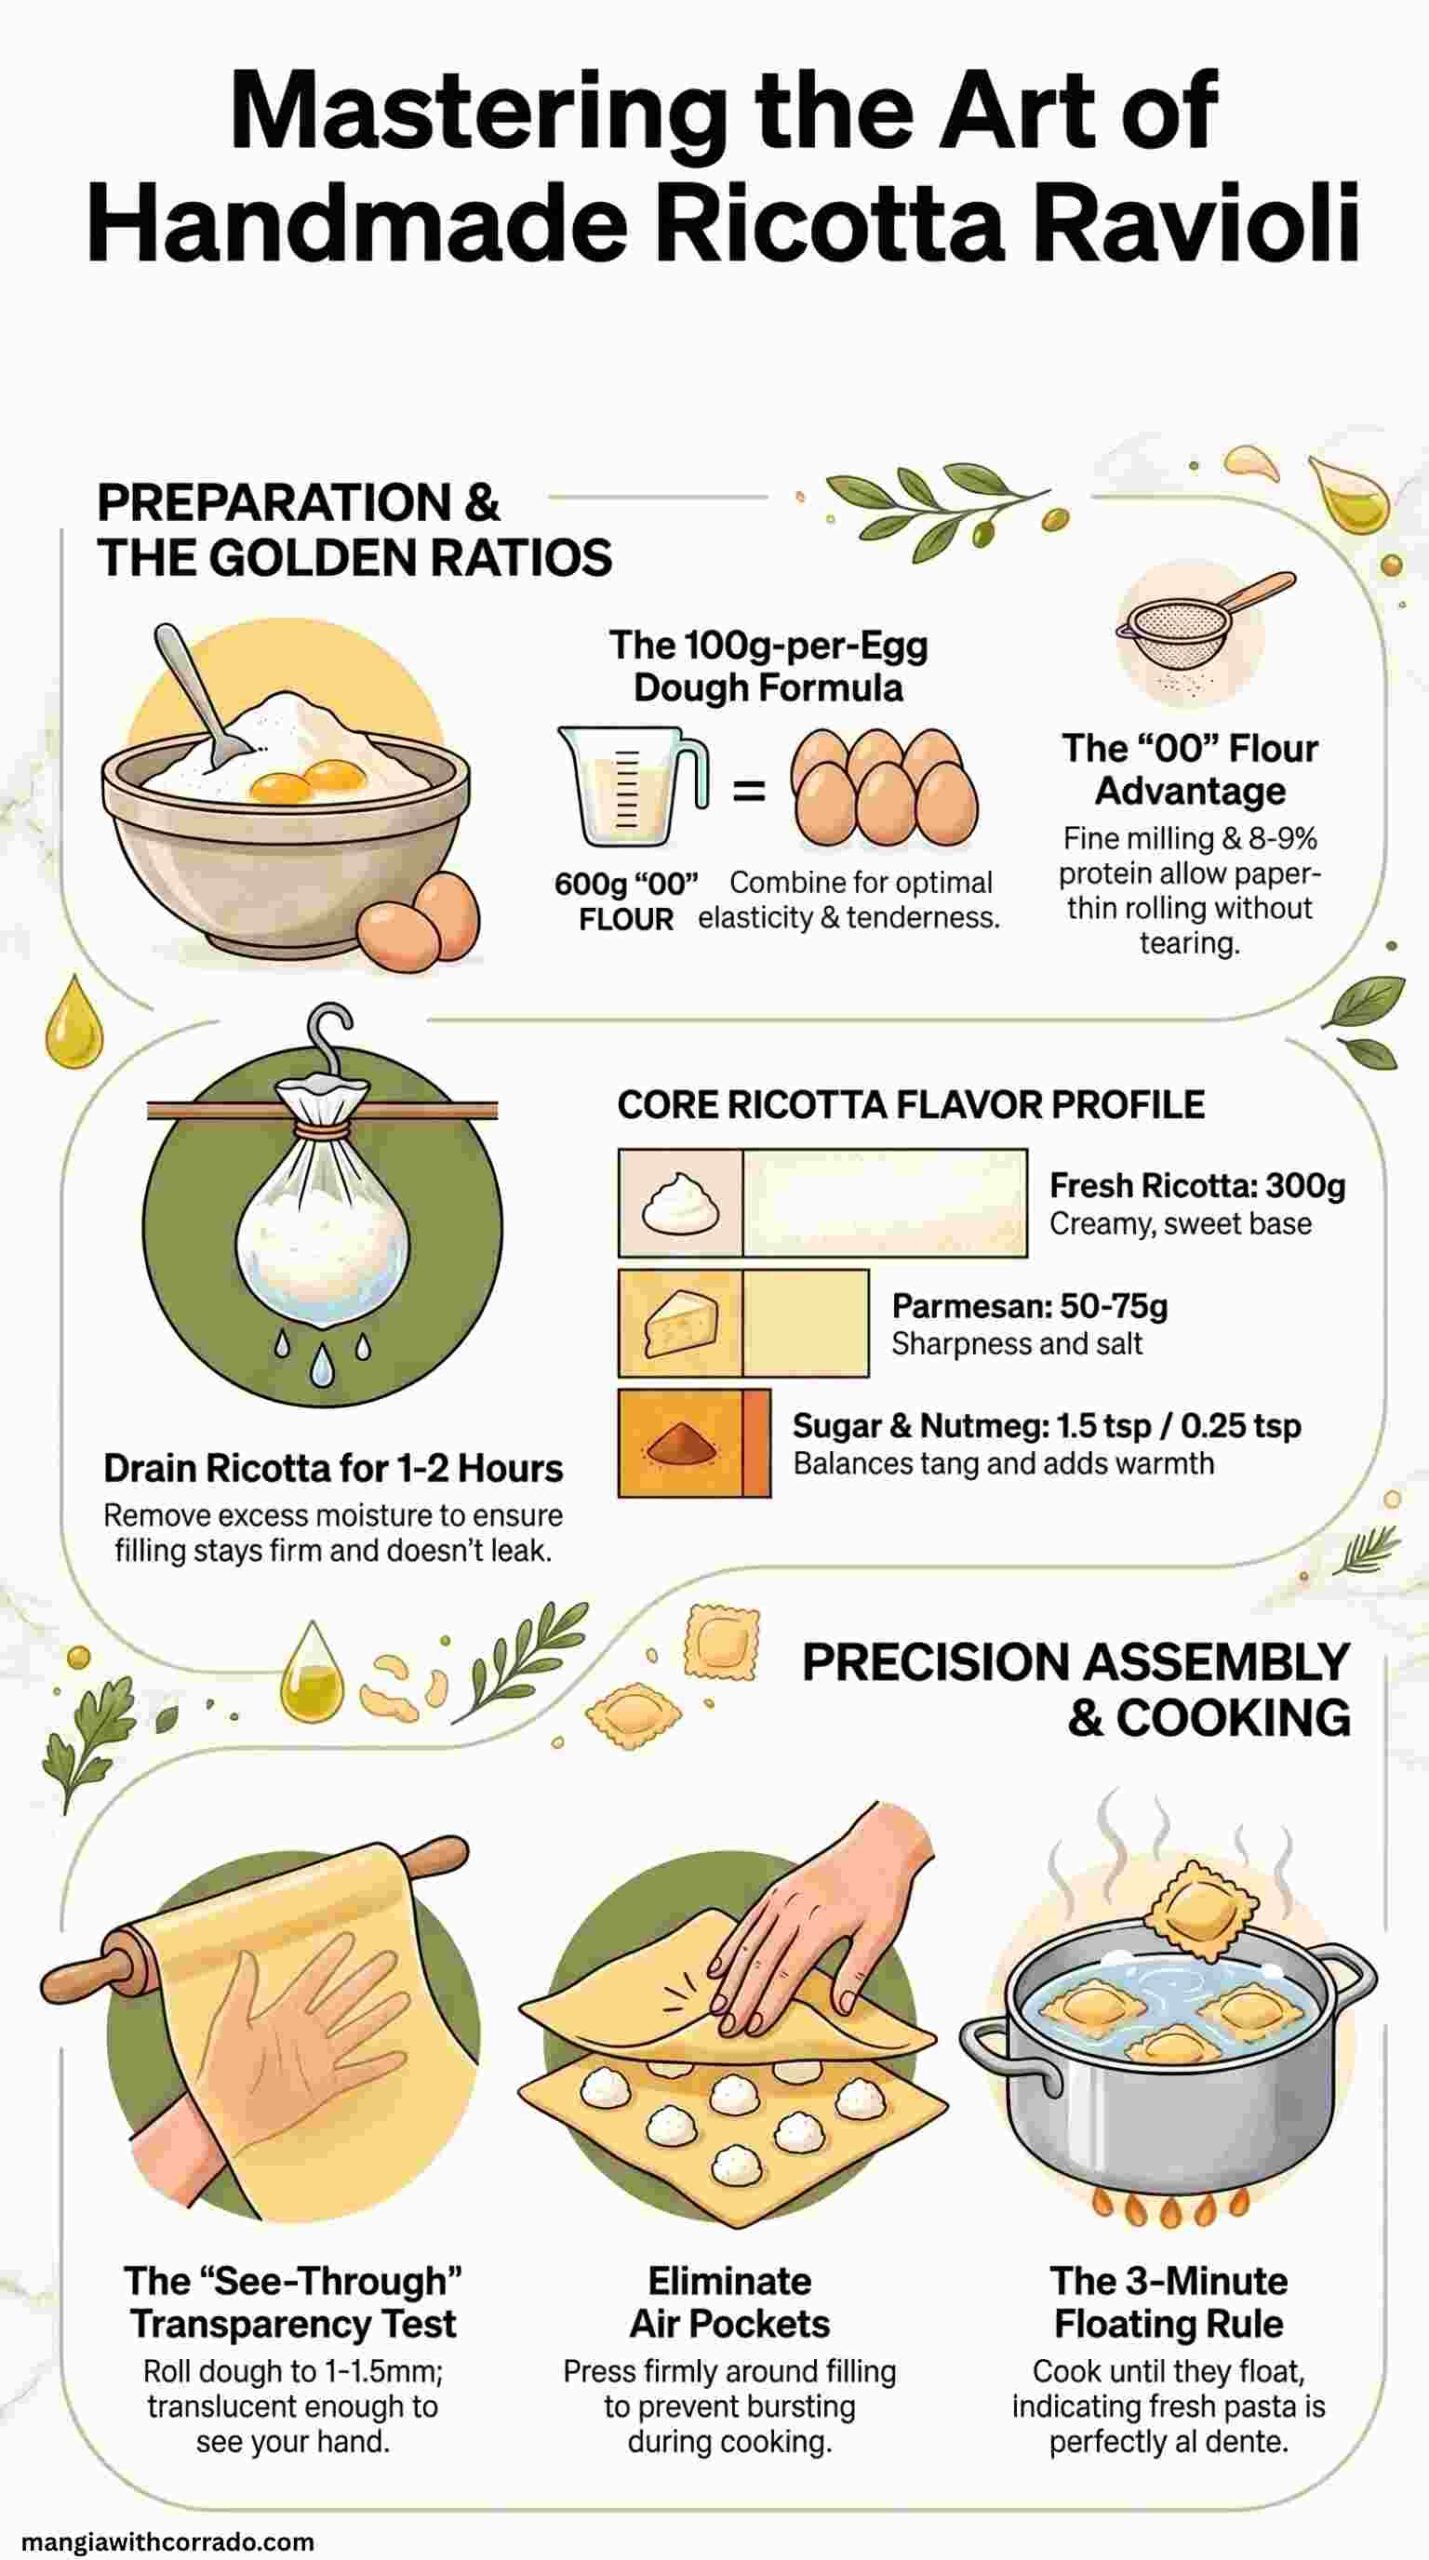
Ricotta’s moisture content significantly affects filling consistency. Fresh ricotta contains considerable liquid that can make filling too loose. If your ricotta appears very wet or has visible liquid pooling, drain it for 1-2 hours in a fine-mesh strainer lined with cheesecloth, allowing excess moisture to drip away. This creates firmer filling that’s easier to work with and less likely to leak during cooking.
00 Flour Properties
Italian 00 flour, milled to an exceptionally fine powder, contains 8-9% protein compared to 10-12% in all-purpose flour. This lower protein content creates tender pasta with superior elasticity that rolls thin without tearing. The fine milling also produces smooth dough texture that feels silky under the hands.
According to culinary research, 00 flour’s fine particle size allows it to absorb liquid more gradually and evenly than coarser flours, creating dough that’s easier to work with and produces more consistent results. While all-purpose flour can substitute in a pinch, 00 flour yields noticeably superior texture and handling properties for fresh pasta.
Egg Selection
Large eggs are standard for pasta dough, providing consistent proportions. The 600g flour to 6 eggs ratio (100g flour per egg) represents the traditional Italian formula for egg pasta dough. Room-temperature eggs incorporate more easily into the flour than cold eggs directly from the refrigerator.
Free-range or pasture-raised eggs often have deeper yellow yolks that create more richly colored pasta, though this is aesthetic rather than functional. The key is freshness; fresh eggs create more cohesive dough with better elasticity.
Seasoning the Filling
The small amount of sugar in the filling may seem unusual, but it serves an important function by balancing the ricotta’s natural tang and enhancing its mild sweetness. This technique is traditional in many Italian ricotta fillings, where 1-2 teaspoons of sugar round out flavors without creating noticeable sweetness.
Nutmeg provides warm, slightly sweet spice notes that complement ricotta beautifully. Freshly grated nutmeg offers substantially more vibrant flavor than pre-ground, which loses aromatics quickly. Use a light hand; nutmeg should enhance rather than dominate.
Method
Prepare the Filling
1. Combine ingredients: Place the 300g ricotta in a large mixing bowl. Add grated Parmesan cheese to taste (start with 50g and increase if desired), the finely chopped fresh parsley, freshly grated nutmeg, salt, freshly ground black pepper, and 1½ teaspoons sugar.
2. Mix thoroughly: Using a fork or spatula, stir all ingredients together until smooth and well combined. The mixture should be creamy and cohesive with no lumps of unmixed ricotta or pockets of seasoning. Mix gently but thoroughly; aggressive mixing can break down the ricotta’s delicate structure and create a thinner, less pleasant texture.
3. Taste and adjust: This is critical. Taste the filling and adjust seasoning as needed. The filling should taste well-seasoned on its own, as the pasta dough contributes no flavor. Add more salt if it tastes flat, more Parmesan for sharper, saltier notes, or adjust pepper and nutmeg to preference. Remember that flavors mellow slightly during cooking, so the filling should taste distinctly seasoned.
4. Refrigerate: Cover the bowl with plastic wrap and refrigerate while making the dough. Chilling firms the filling, making it easier to pipe or spoon onto the pasta sheets without spreading or running.
Make the Dough
1. Form the flour well: Pour the 600g of 00 flour onto a clean, smooth work surface, forming a mound. Create a well in the center approximately 15-20cm in diameter with walls high enough to contain the liquid ingredients without overflow. The well technique allows gradual flour incorporation, creating smoother, more uniform dough than mixing everything at once.
2. Add wet ingredients: Crack all 6 eggs into the well’s center. Add 1 tablespoon extra virgin olive oil and a pinch of salt. The olive oil contributes subtle flavor and improves the dough’s extensibility (ability to stretch without tearing), making it easier to roll thin.
3. Begin incorporation: Using a fork, beat the eggs gently, then begin incorporating flour from the inner walls of the well. Work slowly and methodically, pulling small amounts of flour into the egg mixture. As the mixture thickens, continue incorporating flour until it becomes too thick for the fork. At this point, use your hands to continue mixing, gradually working in the remaining flour.
4. Knead the dough: Once all or most flour is incorporated, begin kneading. Push the dough away from you with the heel of your hand, fold it back over itself, rotate a quarter turn, and repeat. Knead vigorously for about 10 minutes. The dough transforms from rough and shaggy to smooth, elastic, and slightly tacky.
Proper kneading develops gluten networks essential for pasta that holds together during cooking. The dough is ready when it bounces back when pressed with a finger, feels smooth and satiny, and no longer sticks to your hands or the work surface.
5. Adjust consistency if needed: Ideal pasta dough should feel slightly tacky but not sticky, and should hold together cohesively without crumbling. If the dough feels too dry and cracks when you try to knead it, add water one teaspoon at a time, kneading thoroughly after each addition.
If too sticky and clings to your hands or the work surface, incorporate additional flour one tablespoon at a time. These adjustments depend on flour absorption, egg size, and humidity, so don’t be concerned if they’re necessary.
6. Rest the dough: Form the dough into a ball, wrap tightly in plastic wrap, and let rest at room temperature for 30 minutes. This resting period is essential; it allows the gluten to relax, making the dough dramatically easier to roll thin without springing back. Rested dough also develops more uniform texture as the flour fully hydrates.
Assemble the Ravioli
1. Prepare your workspace: Lightly flour your work surface. Have a small bowl of water and a pastry brush ready for sealing. Prepare a large tray or baking sheet lightly dusted with flour for holding finished ravioli.
2. Roll the dough: Divide the dough into 4 portions for easier handling, keeping unused portions covered to prevent drying. Working with one portion at a time, roll the dough progressively thinner using a pasta machine (starting at the widest setting and gradually reducing) or a rolling pin.
The sheets should be thin enough to see your hand through them when held up to light, approximately 1-1.5mm thick. Pasta this thin cooks quickly and provides delicate texture that showcases the filling.
If using a pasta machine, roll to the second-thinnest setting (typically setting 6 or 7 on most machines). The thinnest setting often produces sheets too delicate to handle easily for filled pasta.
3. Lay out pasta sheets: Place one rolled sheet on your floured work surface. Work relatively quickly at this stage, as exposed pasta dough begins drying within a few minutes, making it difficult to seal.
4. Add filling: Place small spoonfuls of filling (approximately 1-1½ teaspoons each) on the pasta sheet in evenly spaced rows, leaving about 4-5cm between each mound. The spacing allows room for sealing and cutting without filling oozing out the sides. Consistency in filling amount ensures uniform cooking and eating experience.
5. Brush with water: Using a pastry brush dipped in water, lightly brush the pasta surface around each mound of filling. The water moistens the dough, activating the flour’s starches and creating adhesive that bonds the two layers together. Brush lightly; too much water creates soggy dough that won’t seal properly.
6. Top with second sheet: Carefully drape another rolled pasta sheet over the filling-topped sheet. Starting from one end, gently press down around each mound of filling, working out any air pockets. Trapped air can cause ravioli to burst during cooking, so press thoroughly but gently around each filling mound, creating a tight seal.
7. Cut the ravioli: Using a knife, pastry wheel, or ravioli cutter, cut between the filling mounds to create individual ravioli. Traditional shapes include squares (5-6cm per side) or circles (using a round cutter). Cut as close to the filling as practical while leaving enough sealed border (approximately 5-8mm) to prevent the ravioli from opening during cooking.
8. Seal the edges: Press firmly around all edges of each ravioli using your fingers or the tines of a fork. Fork-pressing creates a decorative crimped edge while ensuring tight sealing. The seal must be complete with no gaps; even small unsealed sections allow filling to leak during cooking.
9. Arrange finished ravioli: Place sealed ravioli on the prepared floured tray in a single layer, ensuring they don’t touch (they’ll stick together). If not cooking immediately, cover with a clean kitchen towel to prevent drying. Fresh ravioli can rest at room temperature for up to 2 hours or refrigerate for up to 24 hours. For longer storage, freeze in a single layer until solid, then transfer to freezer bags for up to 3 months.
Cook the Ravioli
1. Boil water: Bring a large pot of water (at least 6 liters) to a rolling boil. Add salt generously—approximately 2 tablespoons for this quantity of water. The water should taste noticeably salty, properly seasoning the pasta during cooking.
2. Cook gently: Add ravioli to boiling water carefully, working in batches if necessary to avoid overcrowding. Overcrowding lowers water temperature and causes ravioli to stick together. Stir very gently once after adding to prevent sticking to the pot bottom.
Fresh ravioli cook quickly, typically 3-4 minutes. They’re done when they float to the surface and the pasta feels tender when bitten (with no raw flour taste). The filling should be heated through but doesn’t require extended cooking since the ricotta is already edible.
3. Remove carefully: Using a slotted spoon or spider strainer, lift ravioli from the water gently. They’re delicate and can tear if handled roughly. Let excess water drain back into the pot before transferring to serving plates or a warm bowl.
Sauce and Serving Suggestions
While these ravioli are flavorful enough to enjoy with just a drizzle of extra virgin olive oil and grated Parmesan, simple sauces enhance without overwhelming the delicate filling:
Classic butter and sage sauce: Melt 60-80g butter in a large skillet over medium heat. Add 8-10 fresh sage leaves and cook until the butter turns light brown and smells nutty (2-3 minutes). Add cooked ravioli directly to the pan, tossing gently to coat. The brown butter’s nutty richness complements the creamy ricotta beautifully.
Simple tomato sauce: A light, fresh tomato sauce provides acidic contrast to the rich filling. Use a simple preparation with tomatoes, garlic, basil, and olive oil, avoiding heavy or meat-based sauces that overpower delicate ricotta.
Cream sauce: Light cream sauce with Parmesan offers luxurious richness. Heat cream with butter until slightly thickened, add grated Parmesan, and toss with ravioli.
Extra virgin olive oil and herbs: The simplest approach: toss cooked ravioli with high-quality extra virgin olive oil, freshly grated Parmesan, and chopped fresh herbs (basil, parsley, or a combination).
Regardless of sauce choice, serve immediately in warmed bowls with additional grated Parmesan and freshly ground black pepper.
Technical Notes on Ravioli Success
Several factors determine whether ravioli succeed or fail during cooking:
Dough thickness: Too-thick pasta creates doughy, heavy ravioli that tastes more of pasta than filling. Too-thin sheets tear easily during assembly or cooking. The “see your hand through it” test provides reliable guidance—the dough should be translucent but not so thin it tears when lifted.
Proper sealing: This cannot be overstated. Incomplete seals cause ravioli to open during cooking, releasing filling into the water and creating disappointing, hollow pasta squares. Press firmly around all edges, ensuring no air pockets or gaps remain. The fork-crimping technique provides both secure sealing and visual confirmation that all edges are sealed.
Moisture management: Pasta sheets that have dried out won’t seal properly; the water brushed around filling moistens the dough but can’t rehydrate completely dried pasta. Work at a reasonable pace, keeping unused dough covered. Conversely, pasta sheets that are too wet stick to everything and create messy, difficult assembly. Light flour dusting prevents sticking while maintaining workable moisture levels.
Gentle handling during cooking: Fresh ravioli are delicate. Avoid aggressive boiling (which can tear them apart) and rough stirring or removal. The water should bubble gently rather than at a violent rolling boil.
Variations and Flavor Adaptations
The basic technique remains constant while filling variations create entirely different dishes:
Spinach and ricotta: Add 150-200g cooked, squeezed-dry, finely chopped spinach to the ricotta filling for the classic “ravioli verdi.” The spinach adds color, flavor, and nutritional value.
Mushroom enrichment: Sauté 100g finely chopped mushrooms until deeply browned and all moisture has evaporated, then cool completely and mix into the ricotta filling for earthy depth.
Lemon ricotta: Add 1 tablespoon lemon zest and 1 teaspoon lemon juice to the filling for bright, fresh character. This variation pairs beautifully with butter and fresh herbs.
Herb variations: Replace or supplement parsley with fresh basil, chives, or a combination of Italian herbs. Each herb contributes distinct character to the mild ricotta base.
Different cheese additions: Experiment with adding small amounts of Gorgonzola, fontina, or pecorino alongside or instead of some Parmesan for different flavor profiles.
Meat-filled ravioli: Replace ricotta filling entirely with seasoned ground meat (beef, pork, or veal), braised meats, or combinations like the traditional Bolognese filling. These require different assembly considerations as meat fillings have different consistency.
Butternut squash ravioli: Roasted, mashed butternut squash mixed with Parmesan, amaretti cookie crumbs, and nutmeg creates a popular northern Italian variation with sweet-savory complexity.
Storage and Make-Ahead Options
Fresh ravioli are ideal for advance preparation, making them practical for entertaining despite their handmade nature:
Refrigeration: Arranged in a single layer on a floured tray, covered with a towel, ravioli keep refrigerated for up to 24 hours. The pasta firms slightly during refrigeration, which can actually make handling easier during cooking.
Freezing: For longer storage, arrange uncooked ravioli in a single layer on a flour-dusted tray and freeze until completely solid (2-3 hours). Transfer frozen ravioli to freezer bags or containers, removing as much air as possible. Frozen ravioli keep for up to 3 months and cook directly from frozen, adding 1-2 minutes to the cooking time. Don’t thaw before cooking, as this creates mushy pasta.
Dough preparation: Make pasta dough up to 24 hours ahead, wrap tightly, and refrigerate. Bring to room temperature 30 minutes before rolling for easier handling.
Filling preparation: The ricotta filling can be made up to 2 days ahead and refrigerated. The flavors actually improve as they meld, and the chilled filling is easier to work with during assembly.
Troubleshooting Common Issues
Ravioli bursting during cooking: This indicates incomplete sealing or trapped air. Ensure you press out all air pockets when laying the top sheet and seal edges completely. Using a fork to crimp edges creates more secure seals than finger-pressing alone.
Filling too loose and leaking: The ricotta was too wet. Drain ricotta before mixing the filling, and consider adding 1-2 tablespoons of grated Parmesan or fine breadcrumbs to firm it up. Also ensure filling amounts aren’t too large; overfilled ravioli are prone to bursting.
Dough tearing during rolling: The dough wasn’t rested long enough or was rolled too thin. Rest the dough for the full 30 minutes, and if it still seems elastic and springs back, let it rest another 15 minutes. When rolling, if the dough tears repeatedly, it may be too thin—use a slightly thicker setting on your pasta machine.
Pasta tastes doughy: The dough was rolled too thick. Pasta sheets for ravioli should be thin enough to see your hand through them. Thicker pasta requires longer cooking, which can overcook the filling before the pasta is done.
Ravioli sticking together: They were placed too close on the tray or weren’t floured adequately. Always dust the tray with flour and ensure ravioli don’t touch. If they do stick, gentle separation while still fresh usually works; once dried, they may tear.
This homemade ricotta ravioli recipe demonstrates that seemingly complex fresh pasta preparations become manageable through understanding fundamental techniques: proper dough hydration and kneading, appropriate filling consistency, strategic moisture management, and secure sealing.
The result, a tender pasta parcels filled with creamy, well-seasoned ricotta, justifies the effort and provides foundation skills transferable to countless filled pasta variations.
For those looking to expand their pasta-making repertoire, this ravioli technique naturally extends to other preparations like pappardelle with sausage using the same basic dough recipe, or filled pasta variations that showcase seasonal ingredients and regional Italian traditions.