
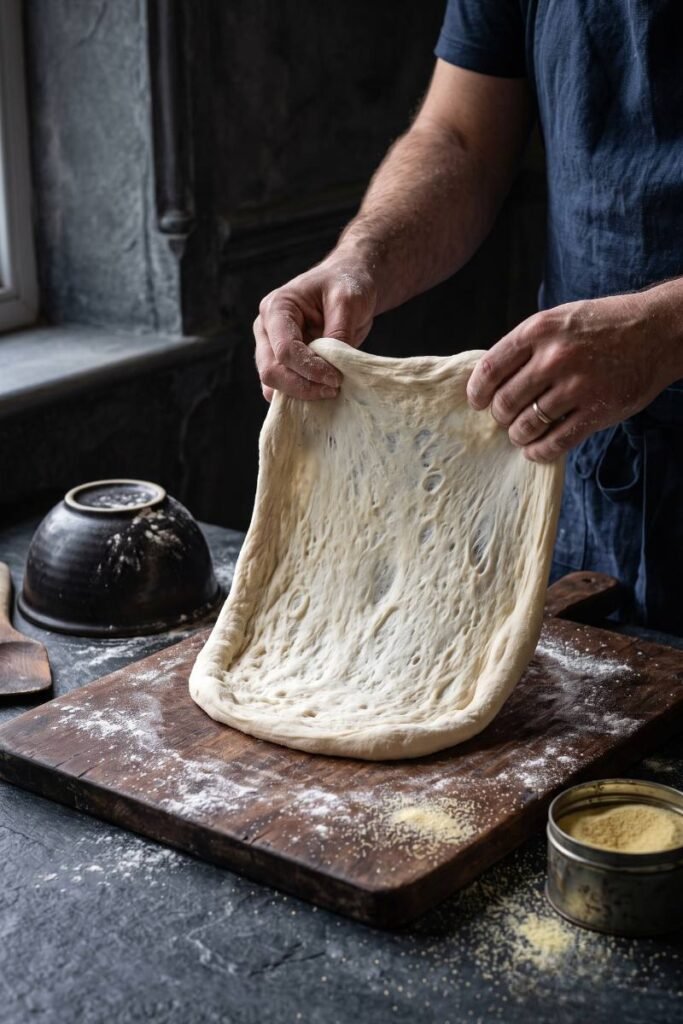
When I flip a matured flour round onto my floured pastry board for a backyard bake, understanding exactly why your homemade pizza dough isn’t stretching is the ultimate structural secret required to stop your base from snapping back like a heavy rubber band.
Over my years of managing high-hydration wheat frameworks and tracking gas retention windows, I have treated stubborn elasticity and structural tearing as direct thermodynamic and protein alignment problems with simple solutions.
Whenever I see amateur home bakers grab a cold, tight ball of dough straight from a chilly refrigerator shelf and pull forcefully on the edges, it hurts the crust. Watching it tear open down the center or bounce right back into a thick clump shows how a lack of handling patience ruins the final shape.
For me, delivering a true restaurant-quality translucent round requires warming the internal core, relaxing the tight protein knots, and letting the gluten strands align smoothly under gentle pressure.
How Cold Temperatures and High Tenacity Lock the Flour Net
To understand why a well-risen ball of wheat can fight your hands so aggressively on the bench, you have to look closely at the molecular behavior of the underlying gluten framework. Gluten is formed when two independent plant proteins found in wheat flour, called gliadin and glutenin, absorb water and link together during kneading to form a highly elastic, stretchable web.
Gliadin gives your dough its fluid extensibility, allowing it to stretch out wide, while glutenin provides its structural tenacity and snap-back resistance. When you store your proofing container inside a cold refrigerator for a slow overnight cold ferment, that intense drop in thermal energy causes these complex protein chains to contract tightly and stiffen up.
Attempting to shape a cold round means the contracted glutenin molecules completely overpower the extensibility phase, locking the dough into a rigid, stubborn state that resists any manual expansion. Pushing through this icy resistance with raw force will simply fracture the brittle cell walls, causing the dough to rip open instantly before it can stretch wide enough to fill your pan.
The Thermal Bench Proofing Window for Flawless Extensibility
My absolute baseline technical rule for converting a rigid, unyielding flour lump into a loose, cooperative disc relies on executing a complete thermal equilibrium rest on your counter. I follow the strict temperature parameters, gluten relaxation timelines, and dough shaping mechanics documented inside the official The Kitchn Pizza Shaping Manual to safely manage my kitchen bakes.
Never bring a cold dough ball straight from the refrigerator to the scorching oven steel without giving the interior lipids and proteins ample time to relax. Pull your proofing containers out of the fridge at least two to three hours before your primary assembly line begins, allowing the core temperature of the wheat to rise to a comfortable seventy degrees.
As the flour warms, the rigid protein crosslinks loosen up naturally, shifting the physical properties away from tight elasticity toward smooth, fluid extensibility. If you begin flattening the warm round and feel the edges starting to resist or shrink backward after a few pushes, walk away from the bench immediately.
Invert a warm ceramic bowl directly over the stubborn disc to trap ambient moisture, and let it rest undisturbed for fifteen minutes. This brief interlude allows the agitated proteins to re-align themselves horizontally, ensuring that when you return, the wheat glides outward effortlessly without a single tear.
Hand Pressing From the Center Outward to Preserve Pan Air
The final law for successfully shaping your relaxed dough assets requires completely banning the use of wooden rolling pins or heavy metal sliders across your board. When you run a heavy wooden pin over a airy dough ball, you mechanically smash the delicate carbon dioxide pockets that your live yeast cells spent days creating.
This flattening pressure drives the trapped air bubbles out through the edges of the round, leaving you with a dense, compressed crumb structure that bakes up like a hard cracker rather than a light artisan crust. Keep your tools inside the drawer, and use only your fingertips to gently press into the center of the relaxed ball, pushing the air pockets outward toward the outer rim to form a thick, protective crust border.
Pick up the flattened disc by its edges, letting gravity naturally stretch the weight of the dough down over the backs of your knuckles as you turn it like a steering wheel. This gentle, air-friendly handling preservation habit is a structural standard I maintain across all my high-hydration projects, a focus I prioritize when managing wet dough foundations inside my guide on Focaccia vs. Ciabatta: What is the Difference in Dough Setup?.
I know my handling execution is fully successful when the stretched sheet floats onto my wooden peel with a uniform thickness, displaying a soft, dimpled rim that is fully primed to puff up into a beautiful, crispy framework inside a hot oven. Taking the extra twenty minutes to properly warm your flour bases and respect the gluten resting windows is the ultimate kitchen secret to delivering a flawless, restaurant-grade pizza to your family table.